Cable Management Arm Installation
Overview
The Hakoforge line of cases support the installation of a Cable Management arm. To use the management arm, you will need to have a rack that is roughly 6" inches deeper than the case you are using.
For example, the Core 34", you will need a rack that is deeper than 40" inches or the use of an rack depth extension.
Part Number
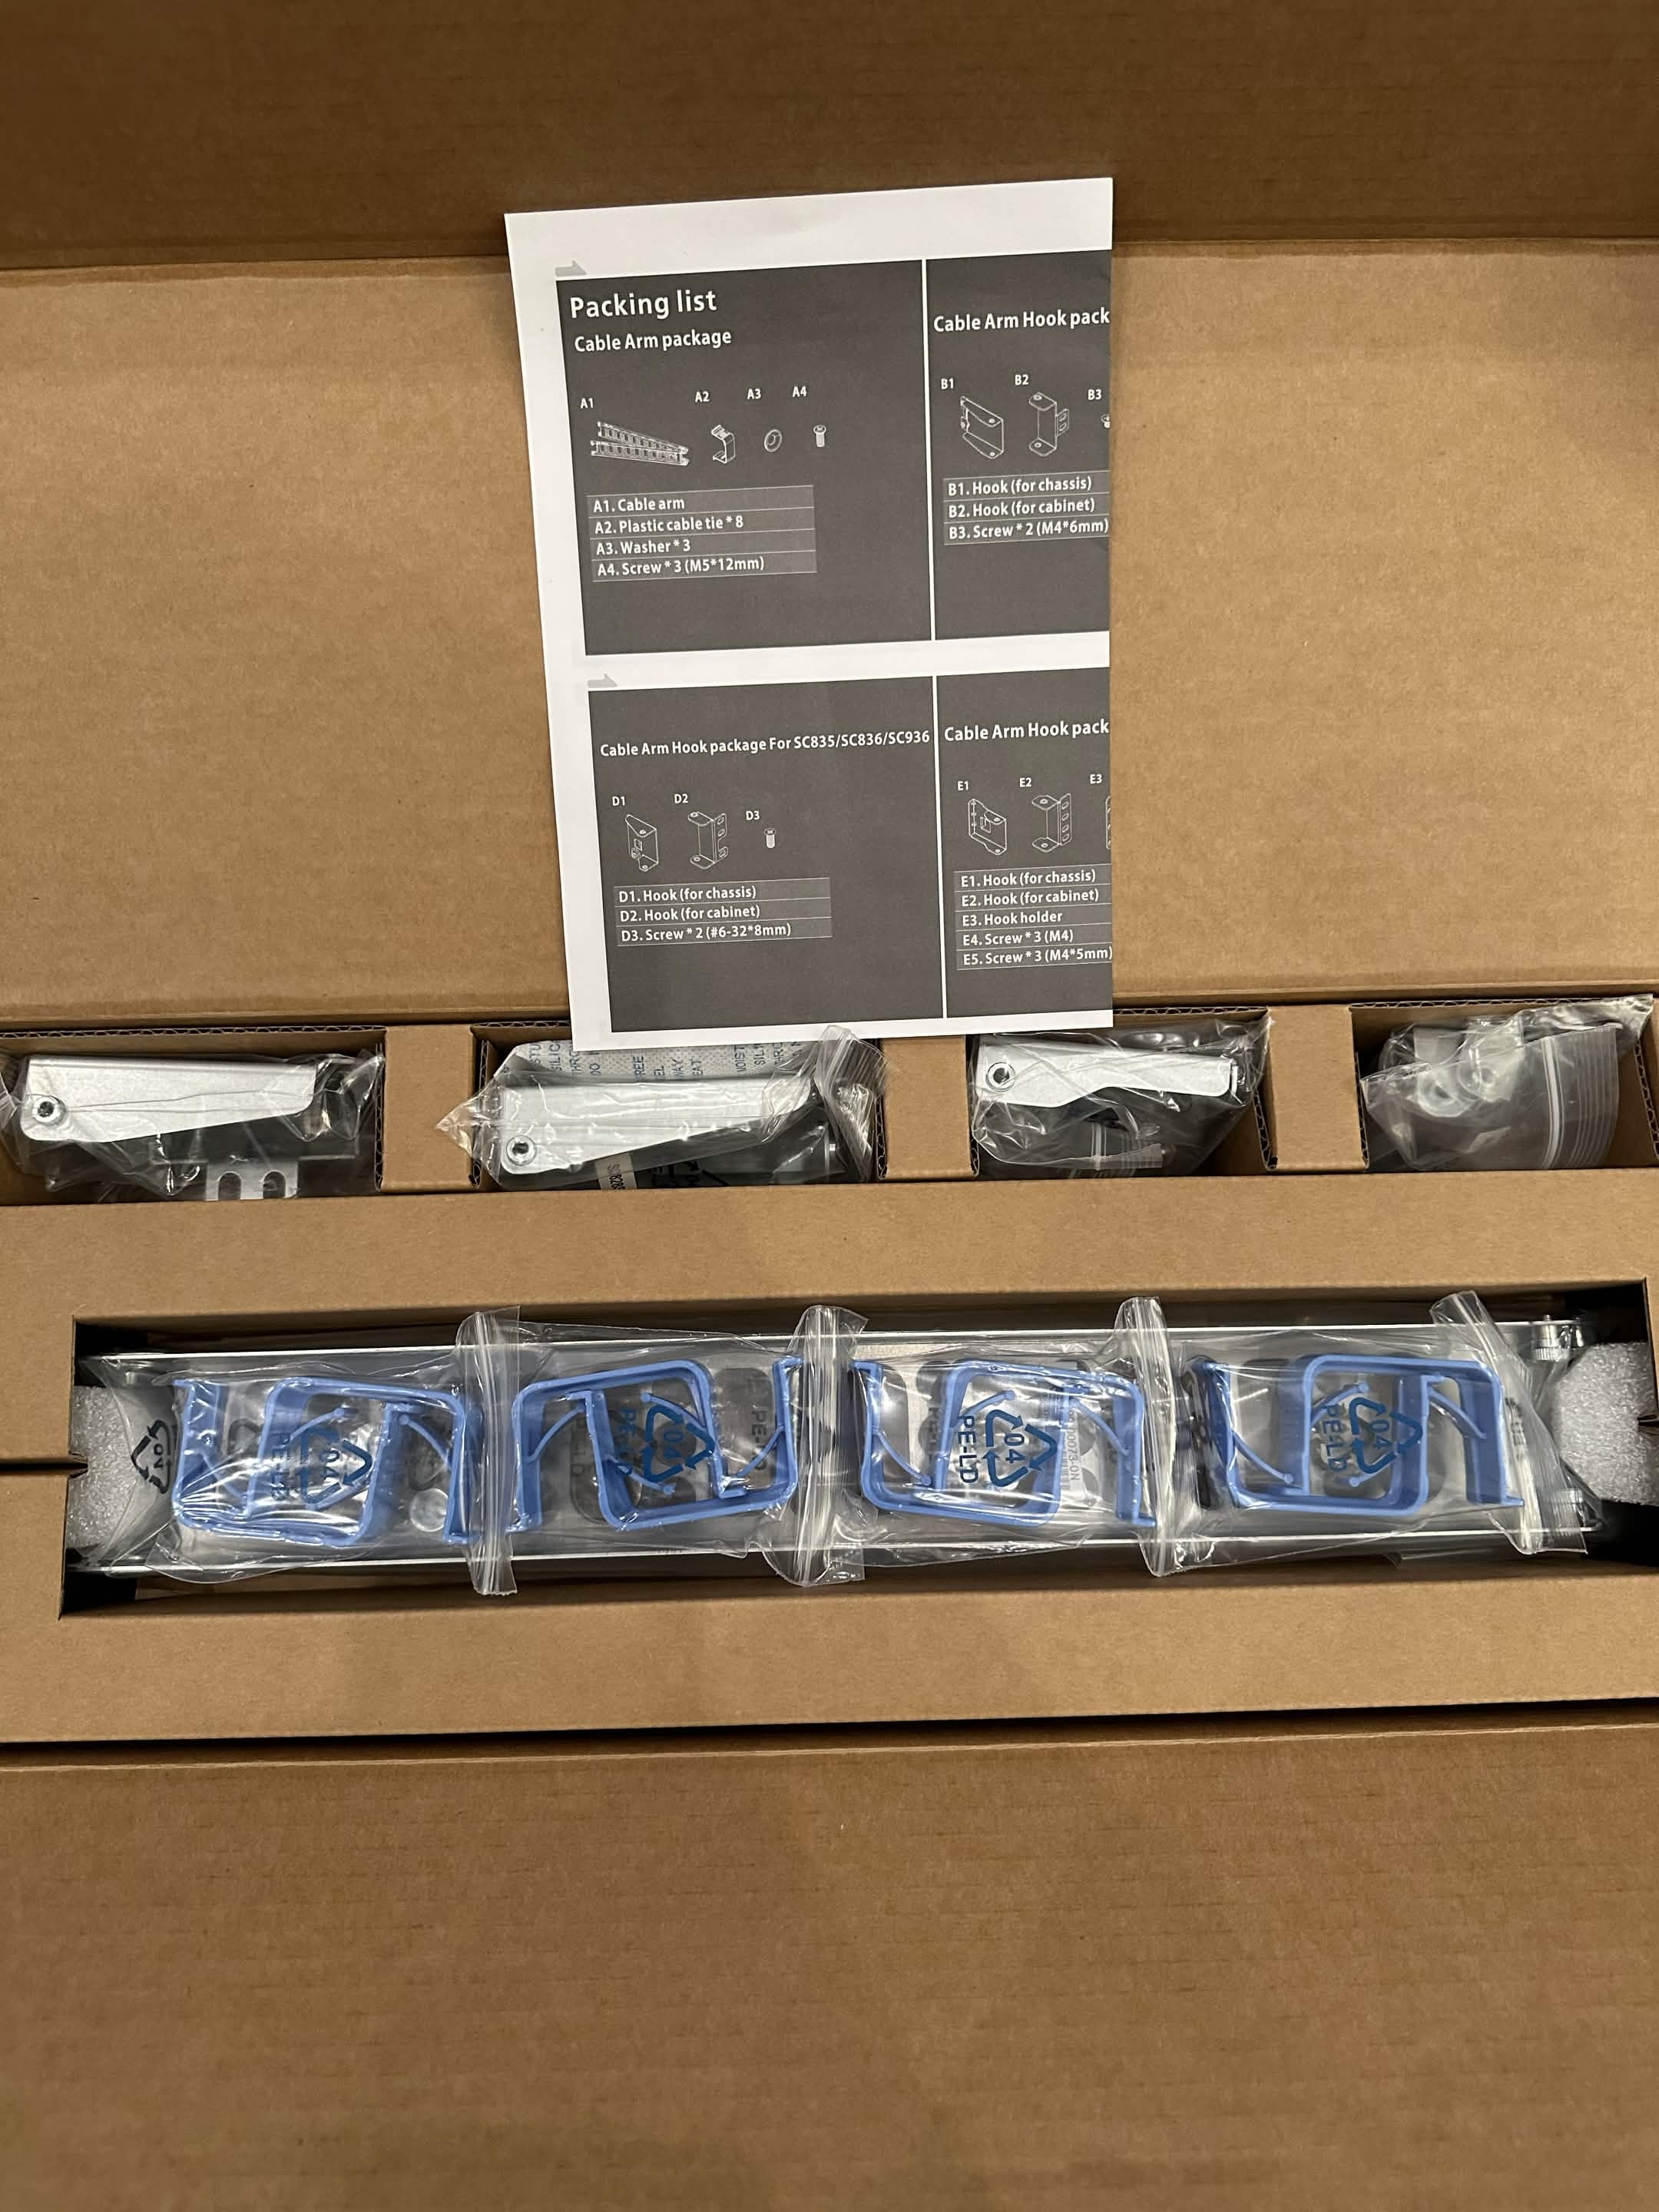
MCP-290-00073-0N
Installation Procedure
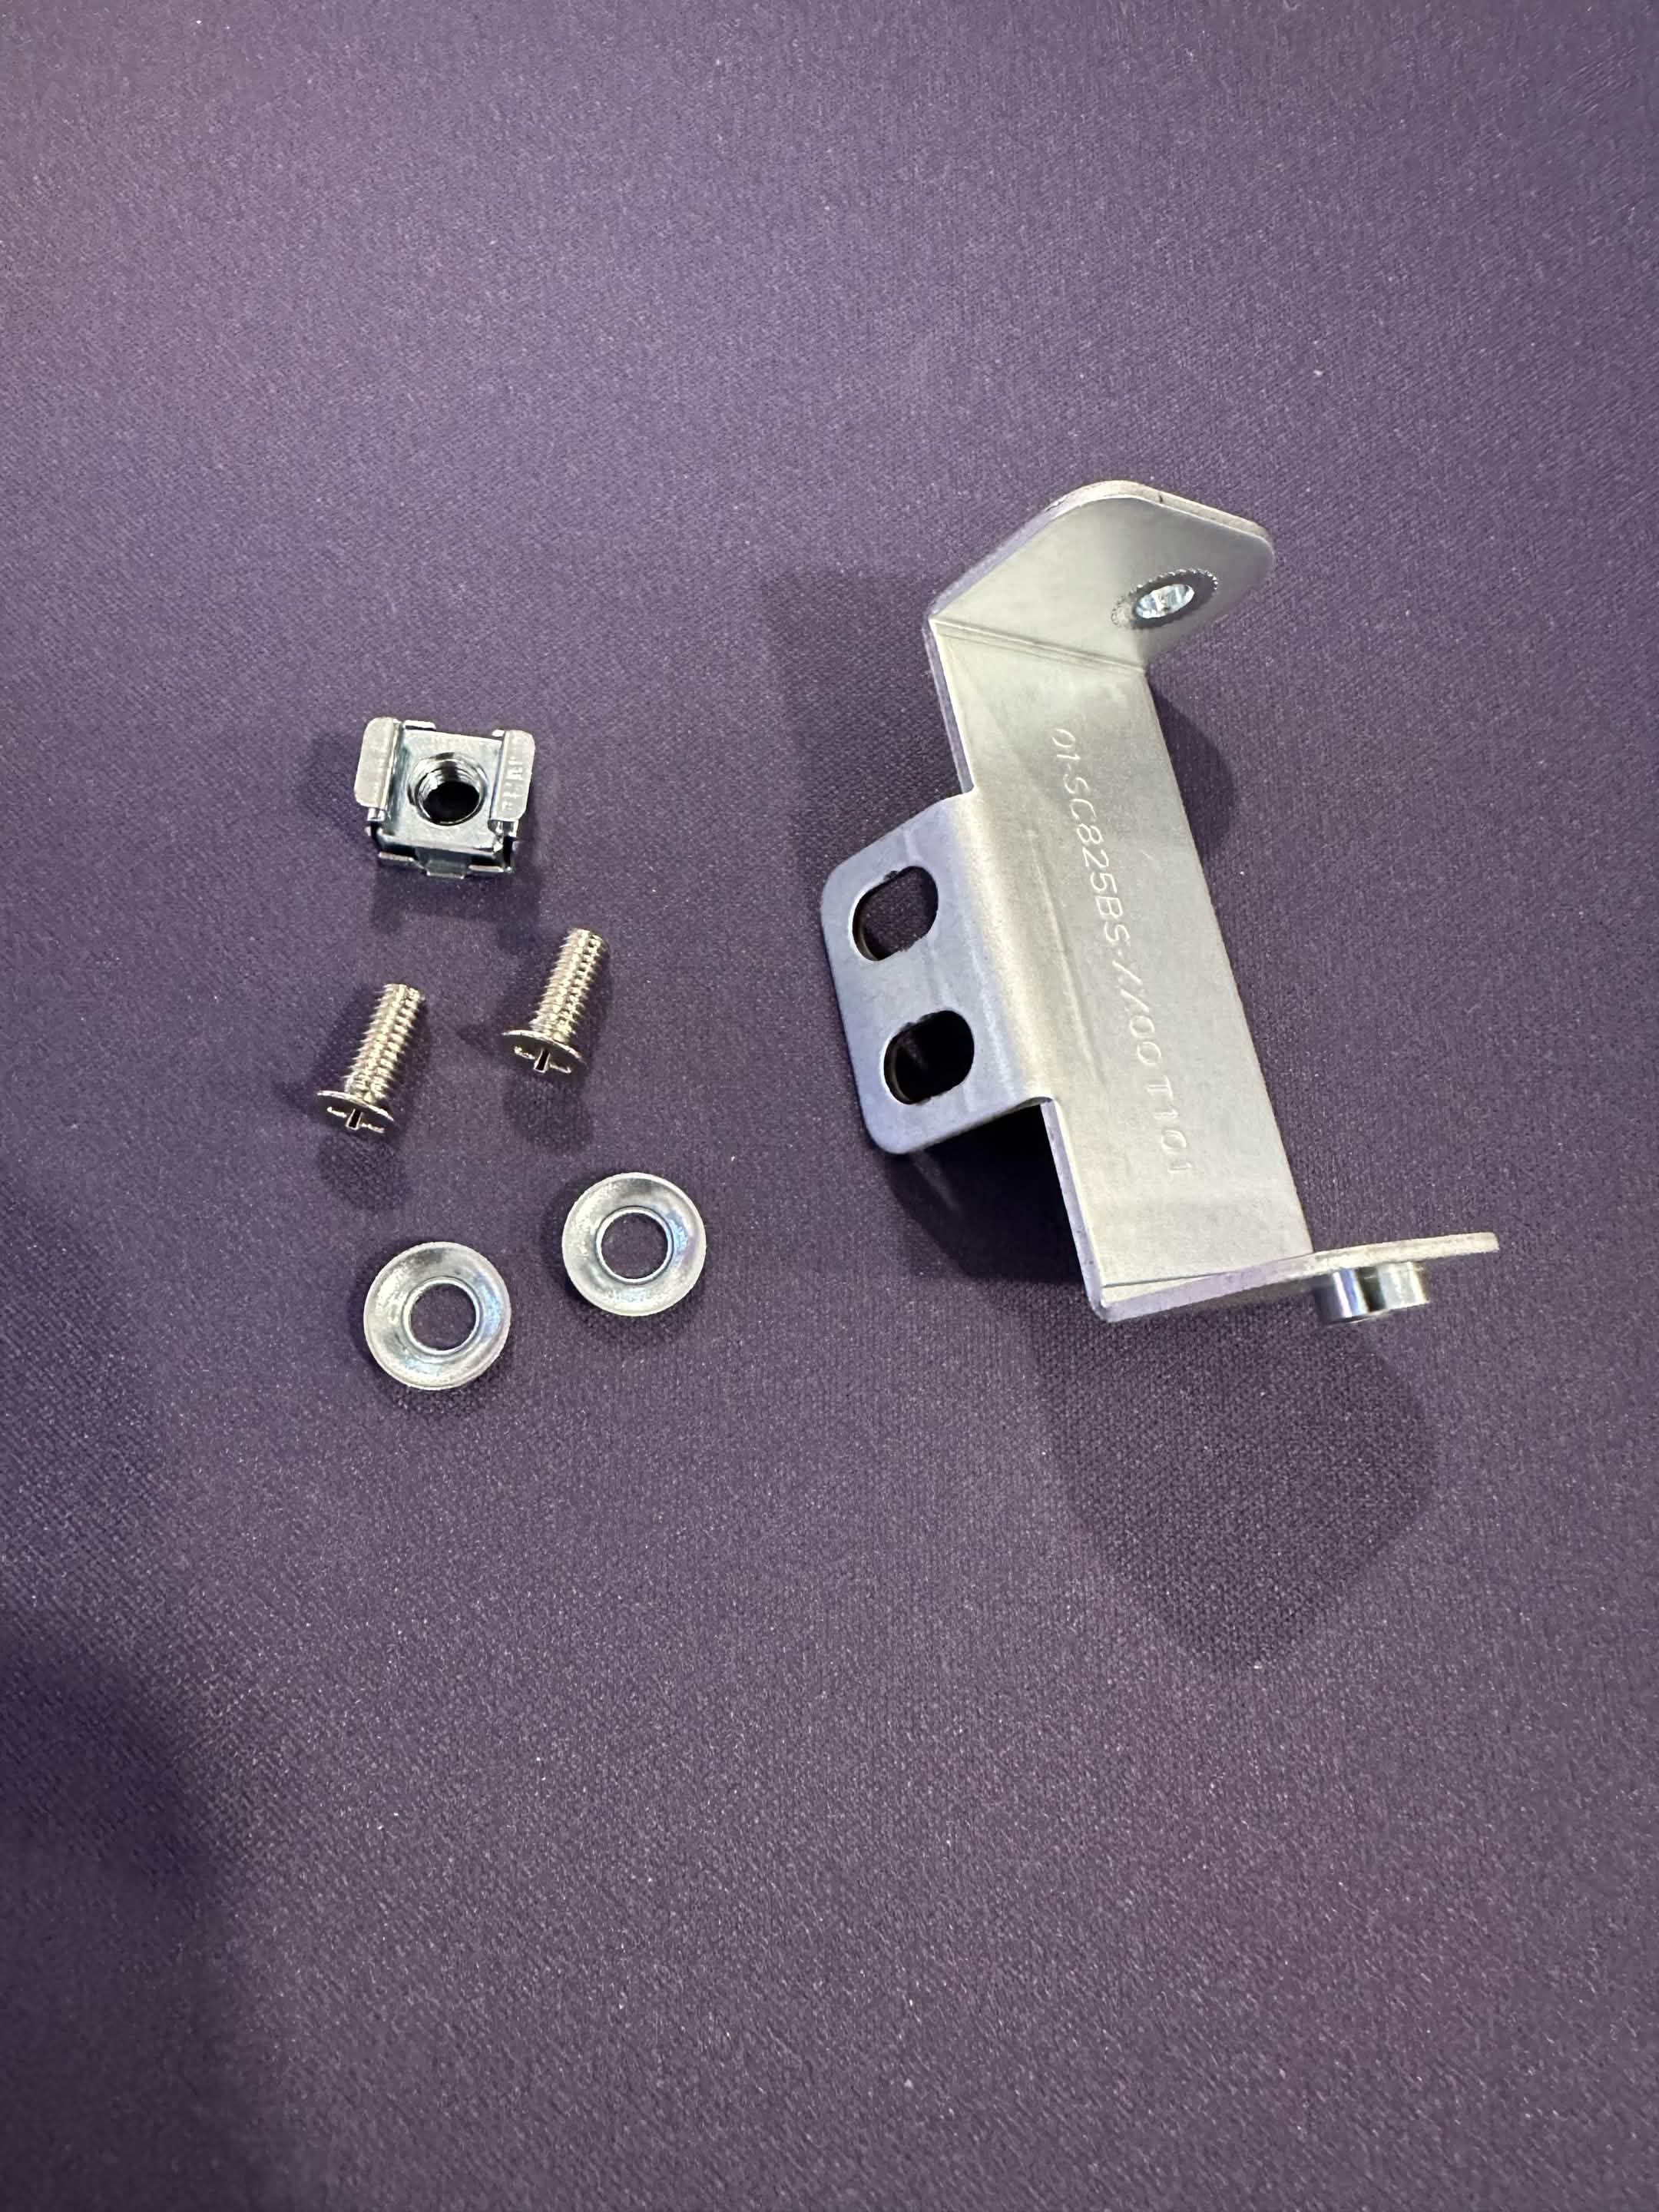
Parts
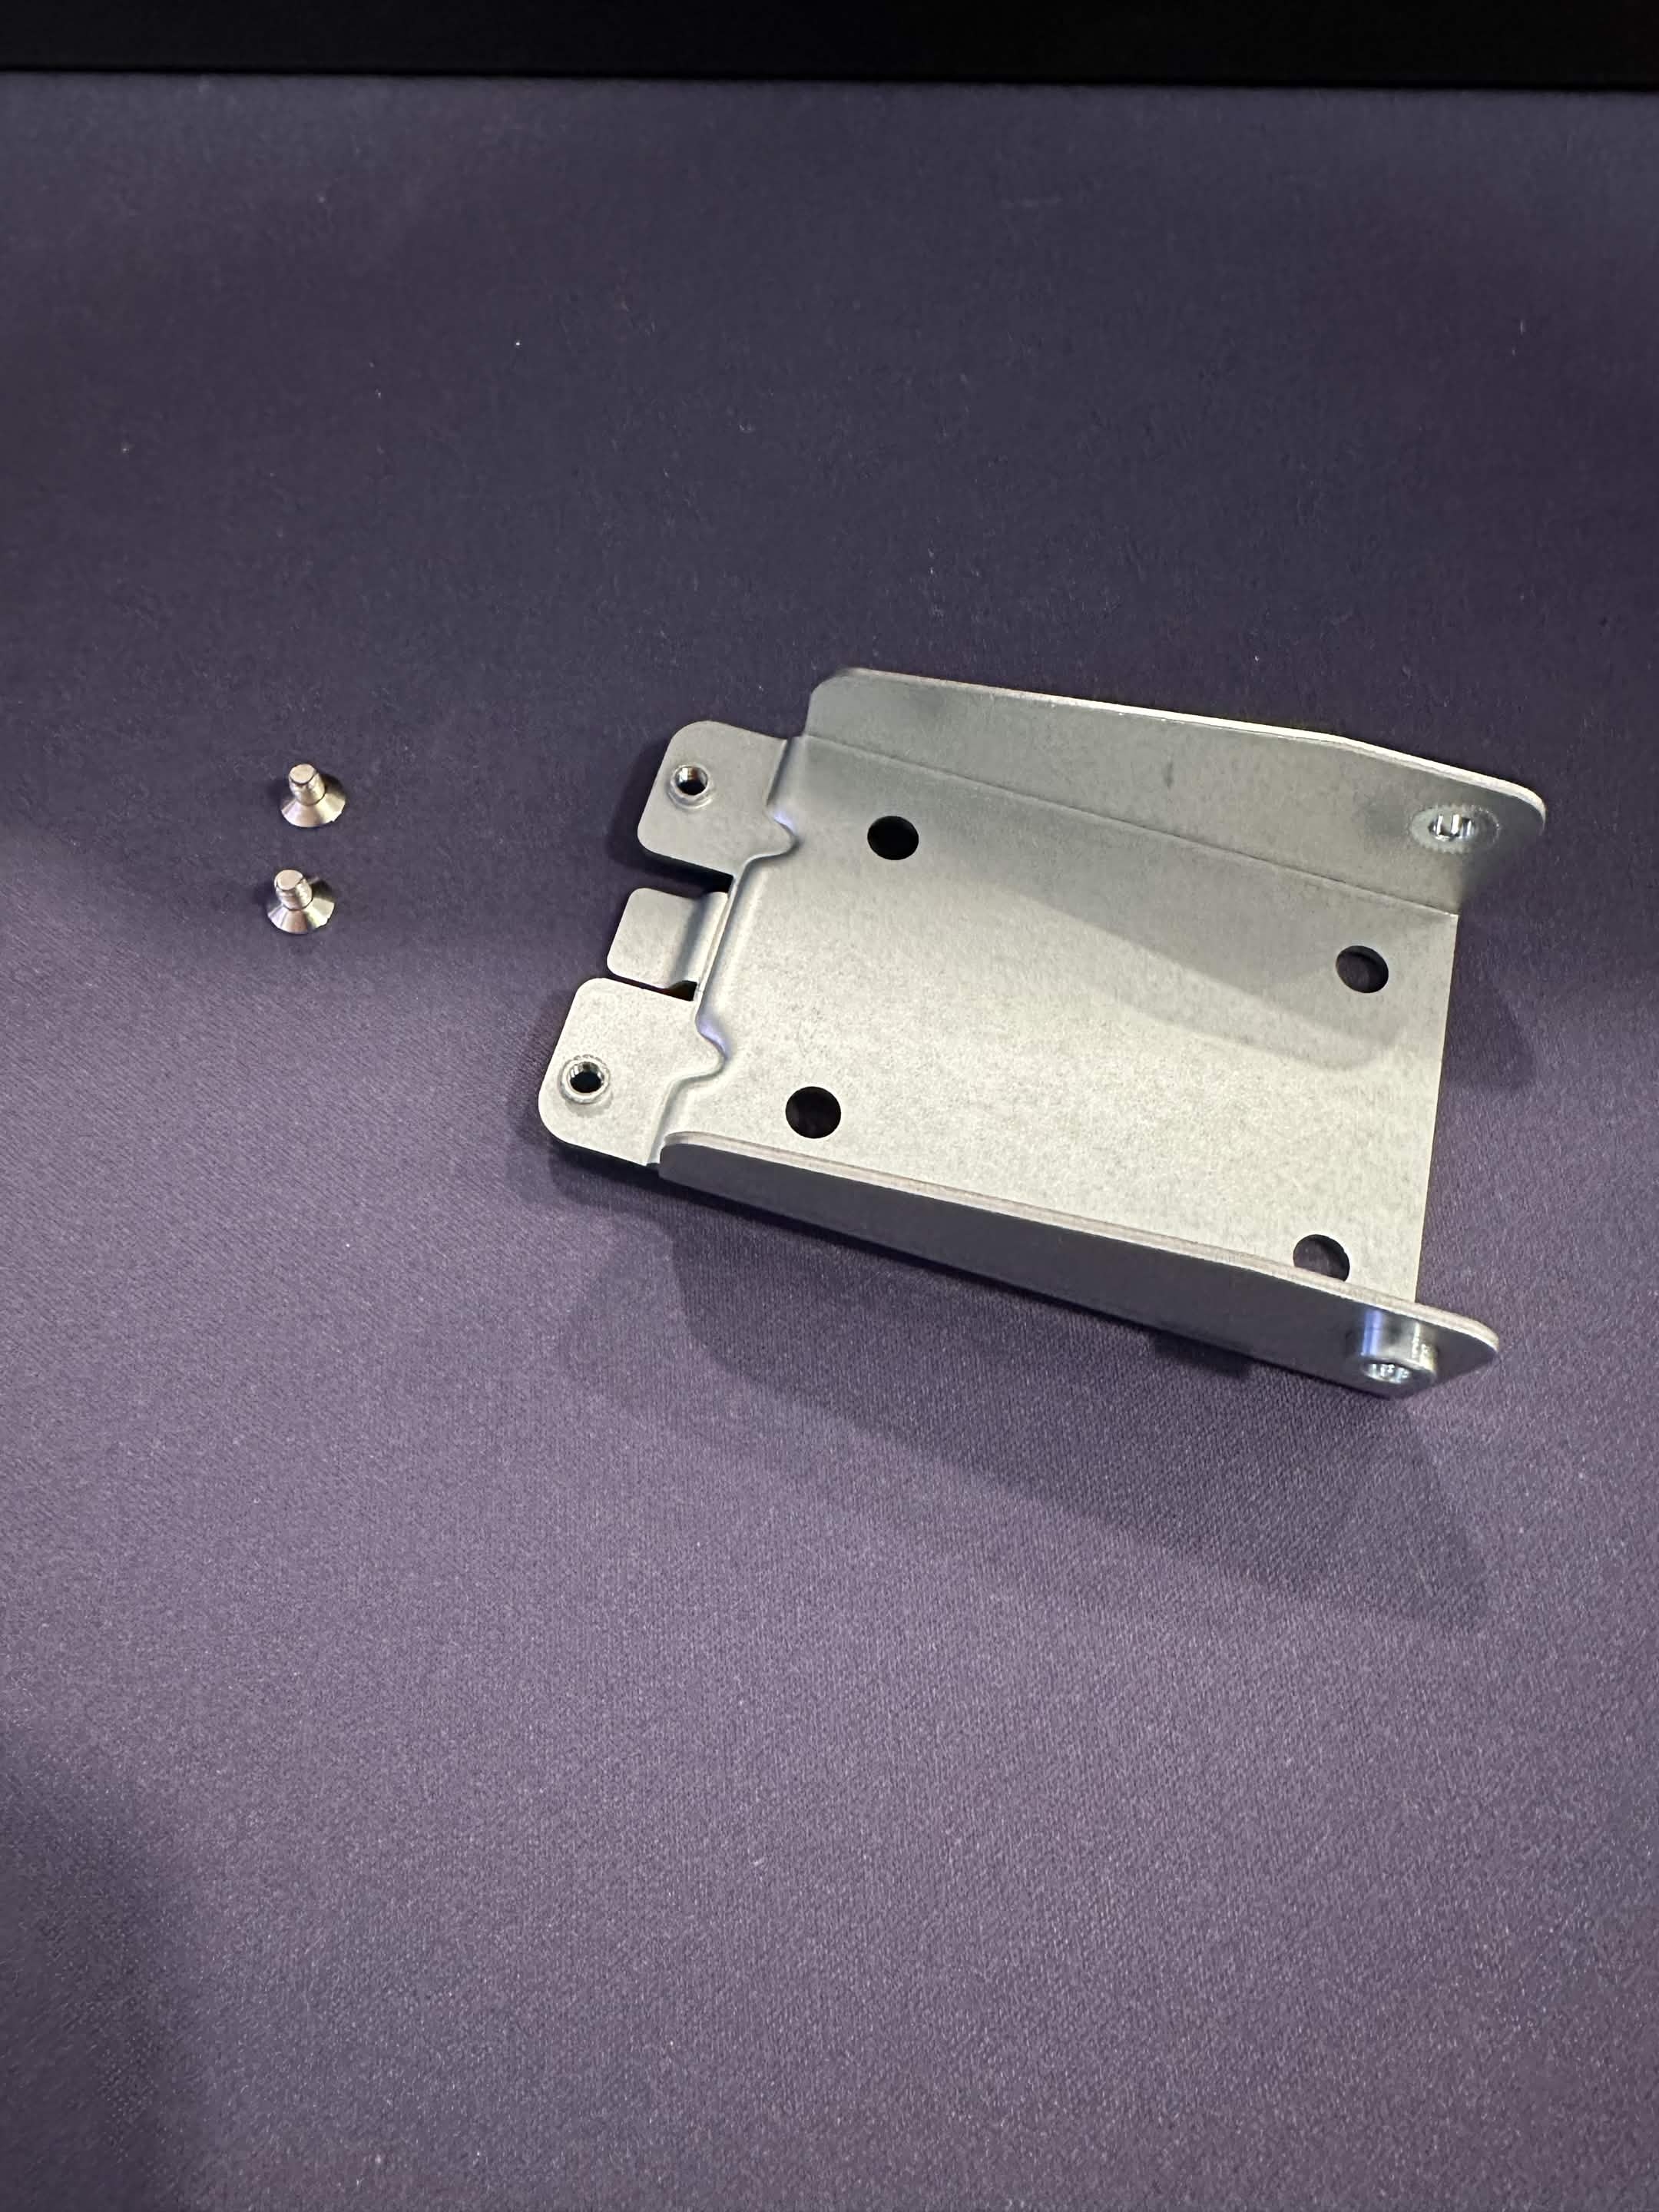
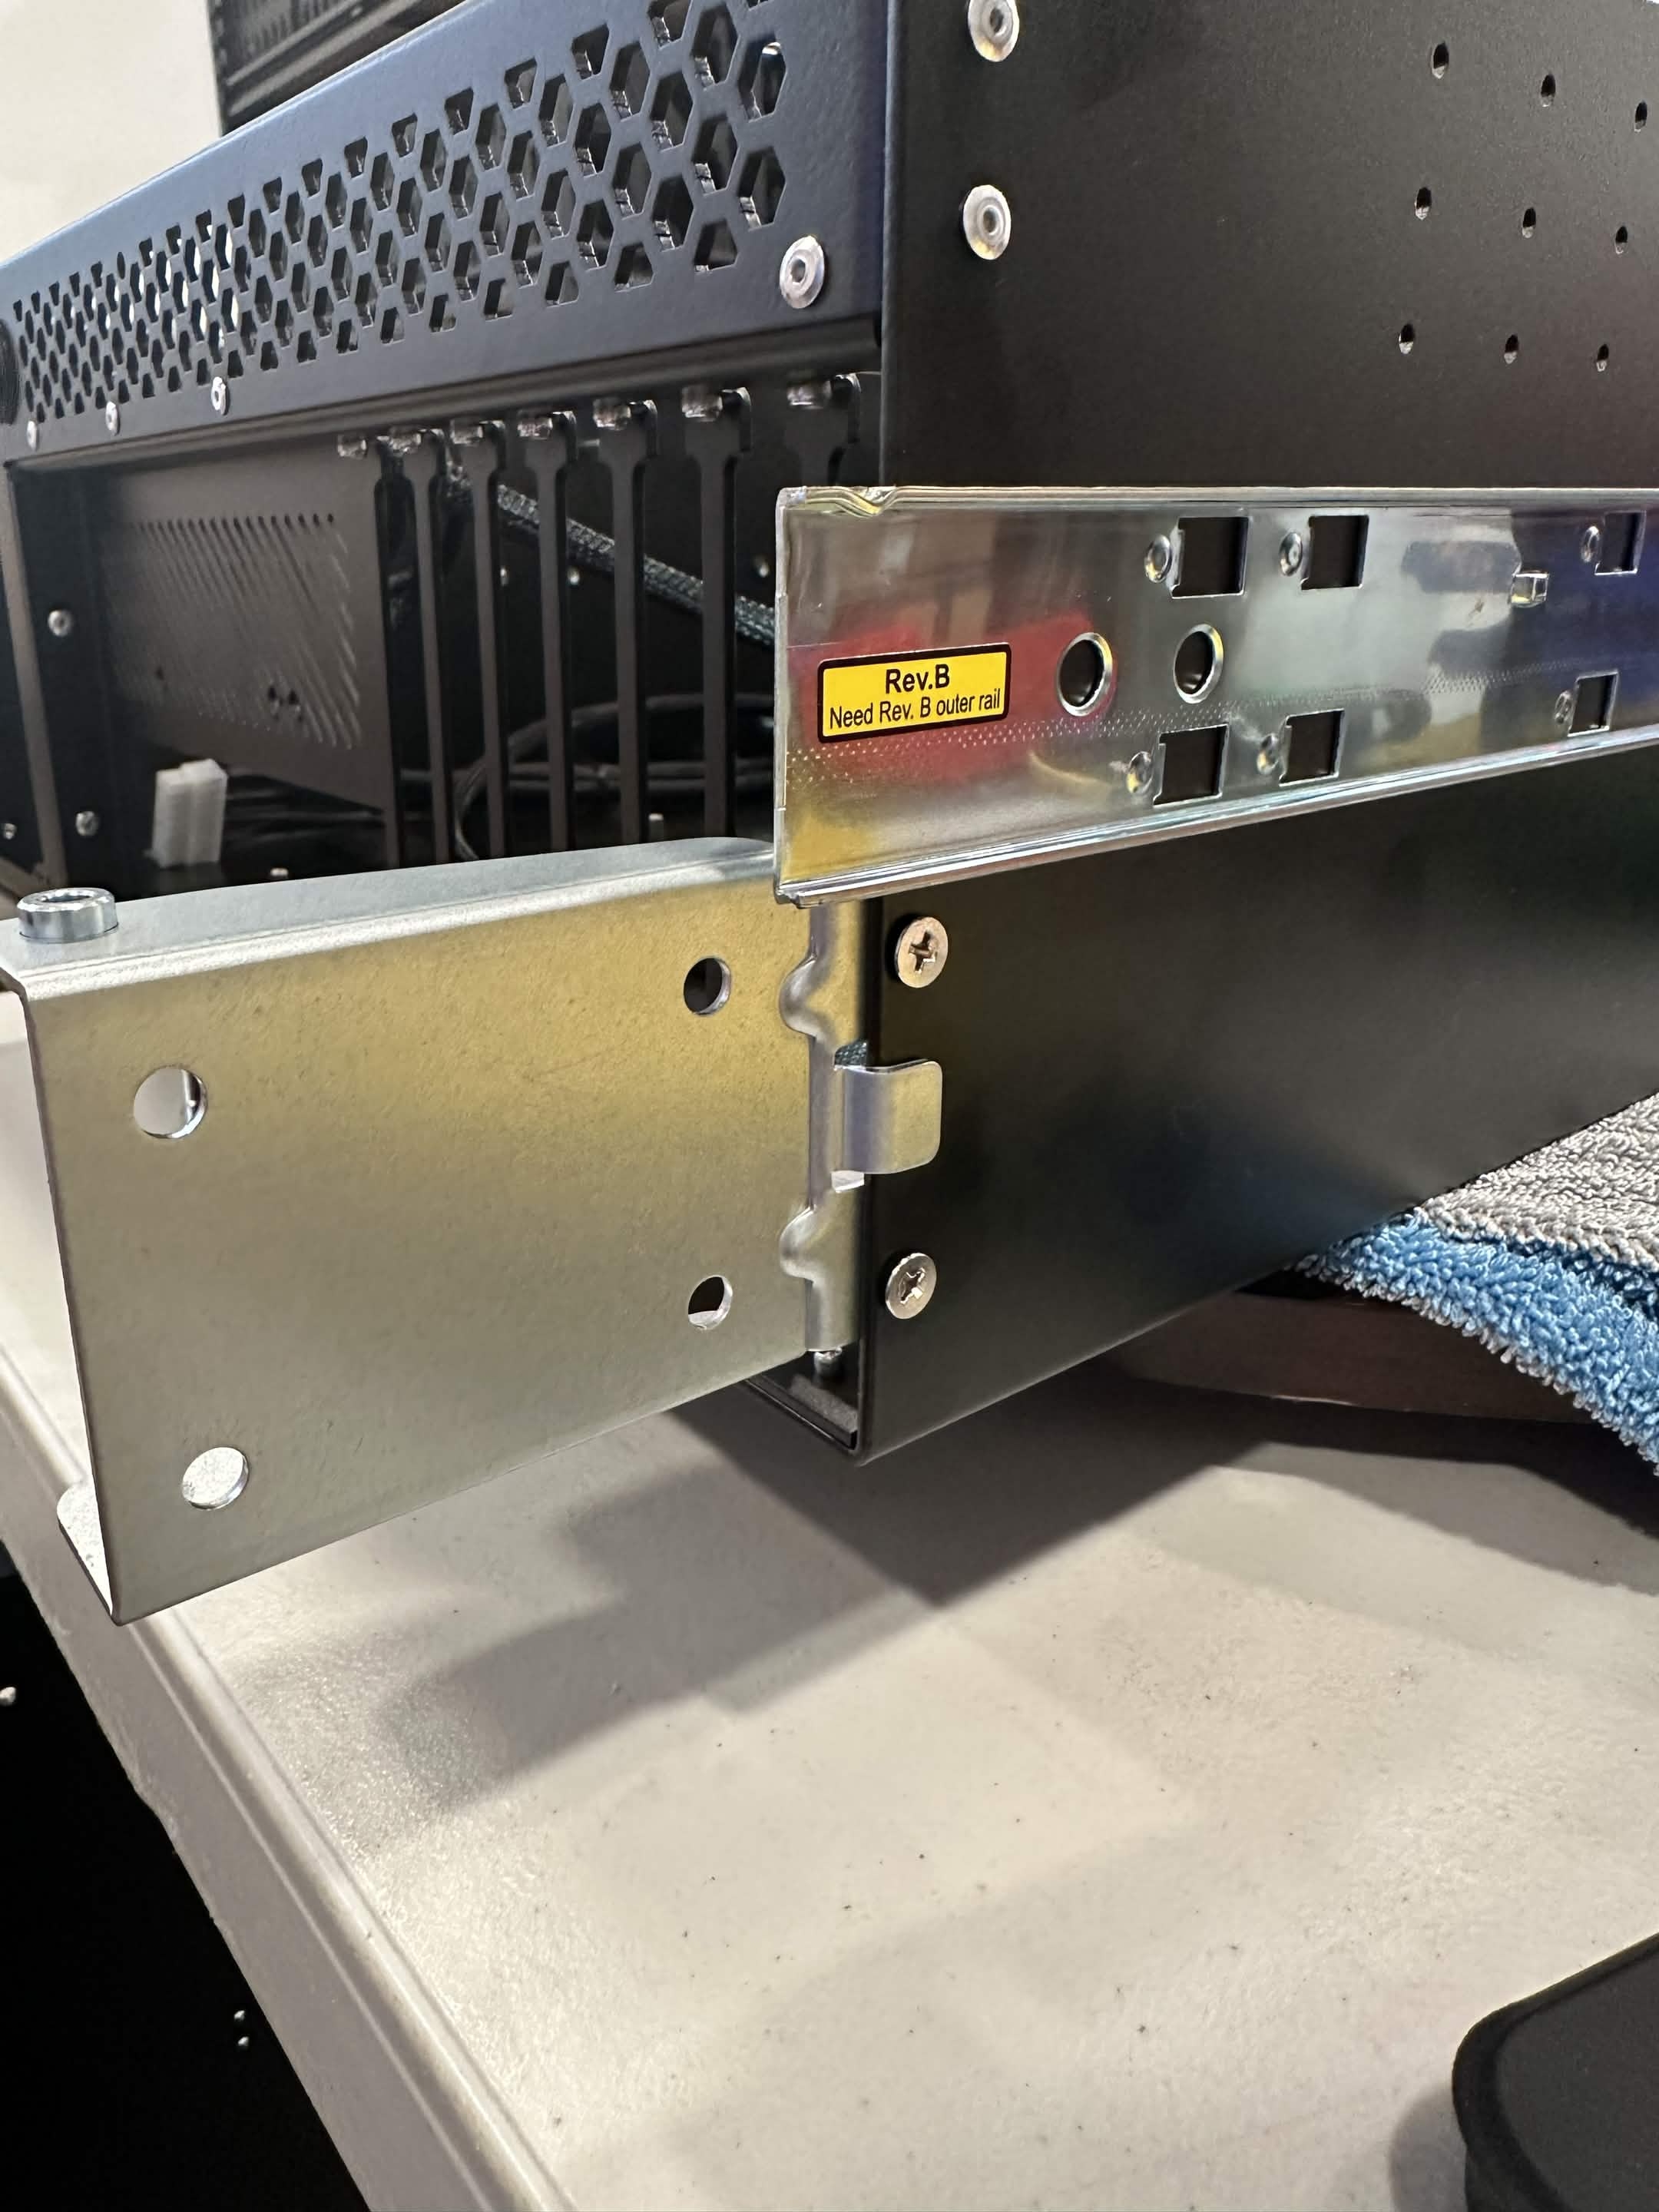
Installing the Case Brackets
Case Bracket - this part will be attached to the case.
Alignment
Because of tolerances between bracket and case, you might have to barely thread both screws first before fully tightening.
- Align the screw holes to the mounting holes at the rear of the Case
- Using the 2 short screws, attach the bracket to the case.
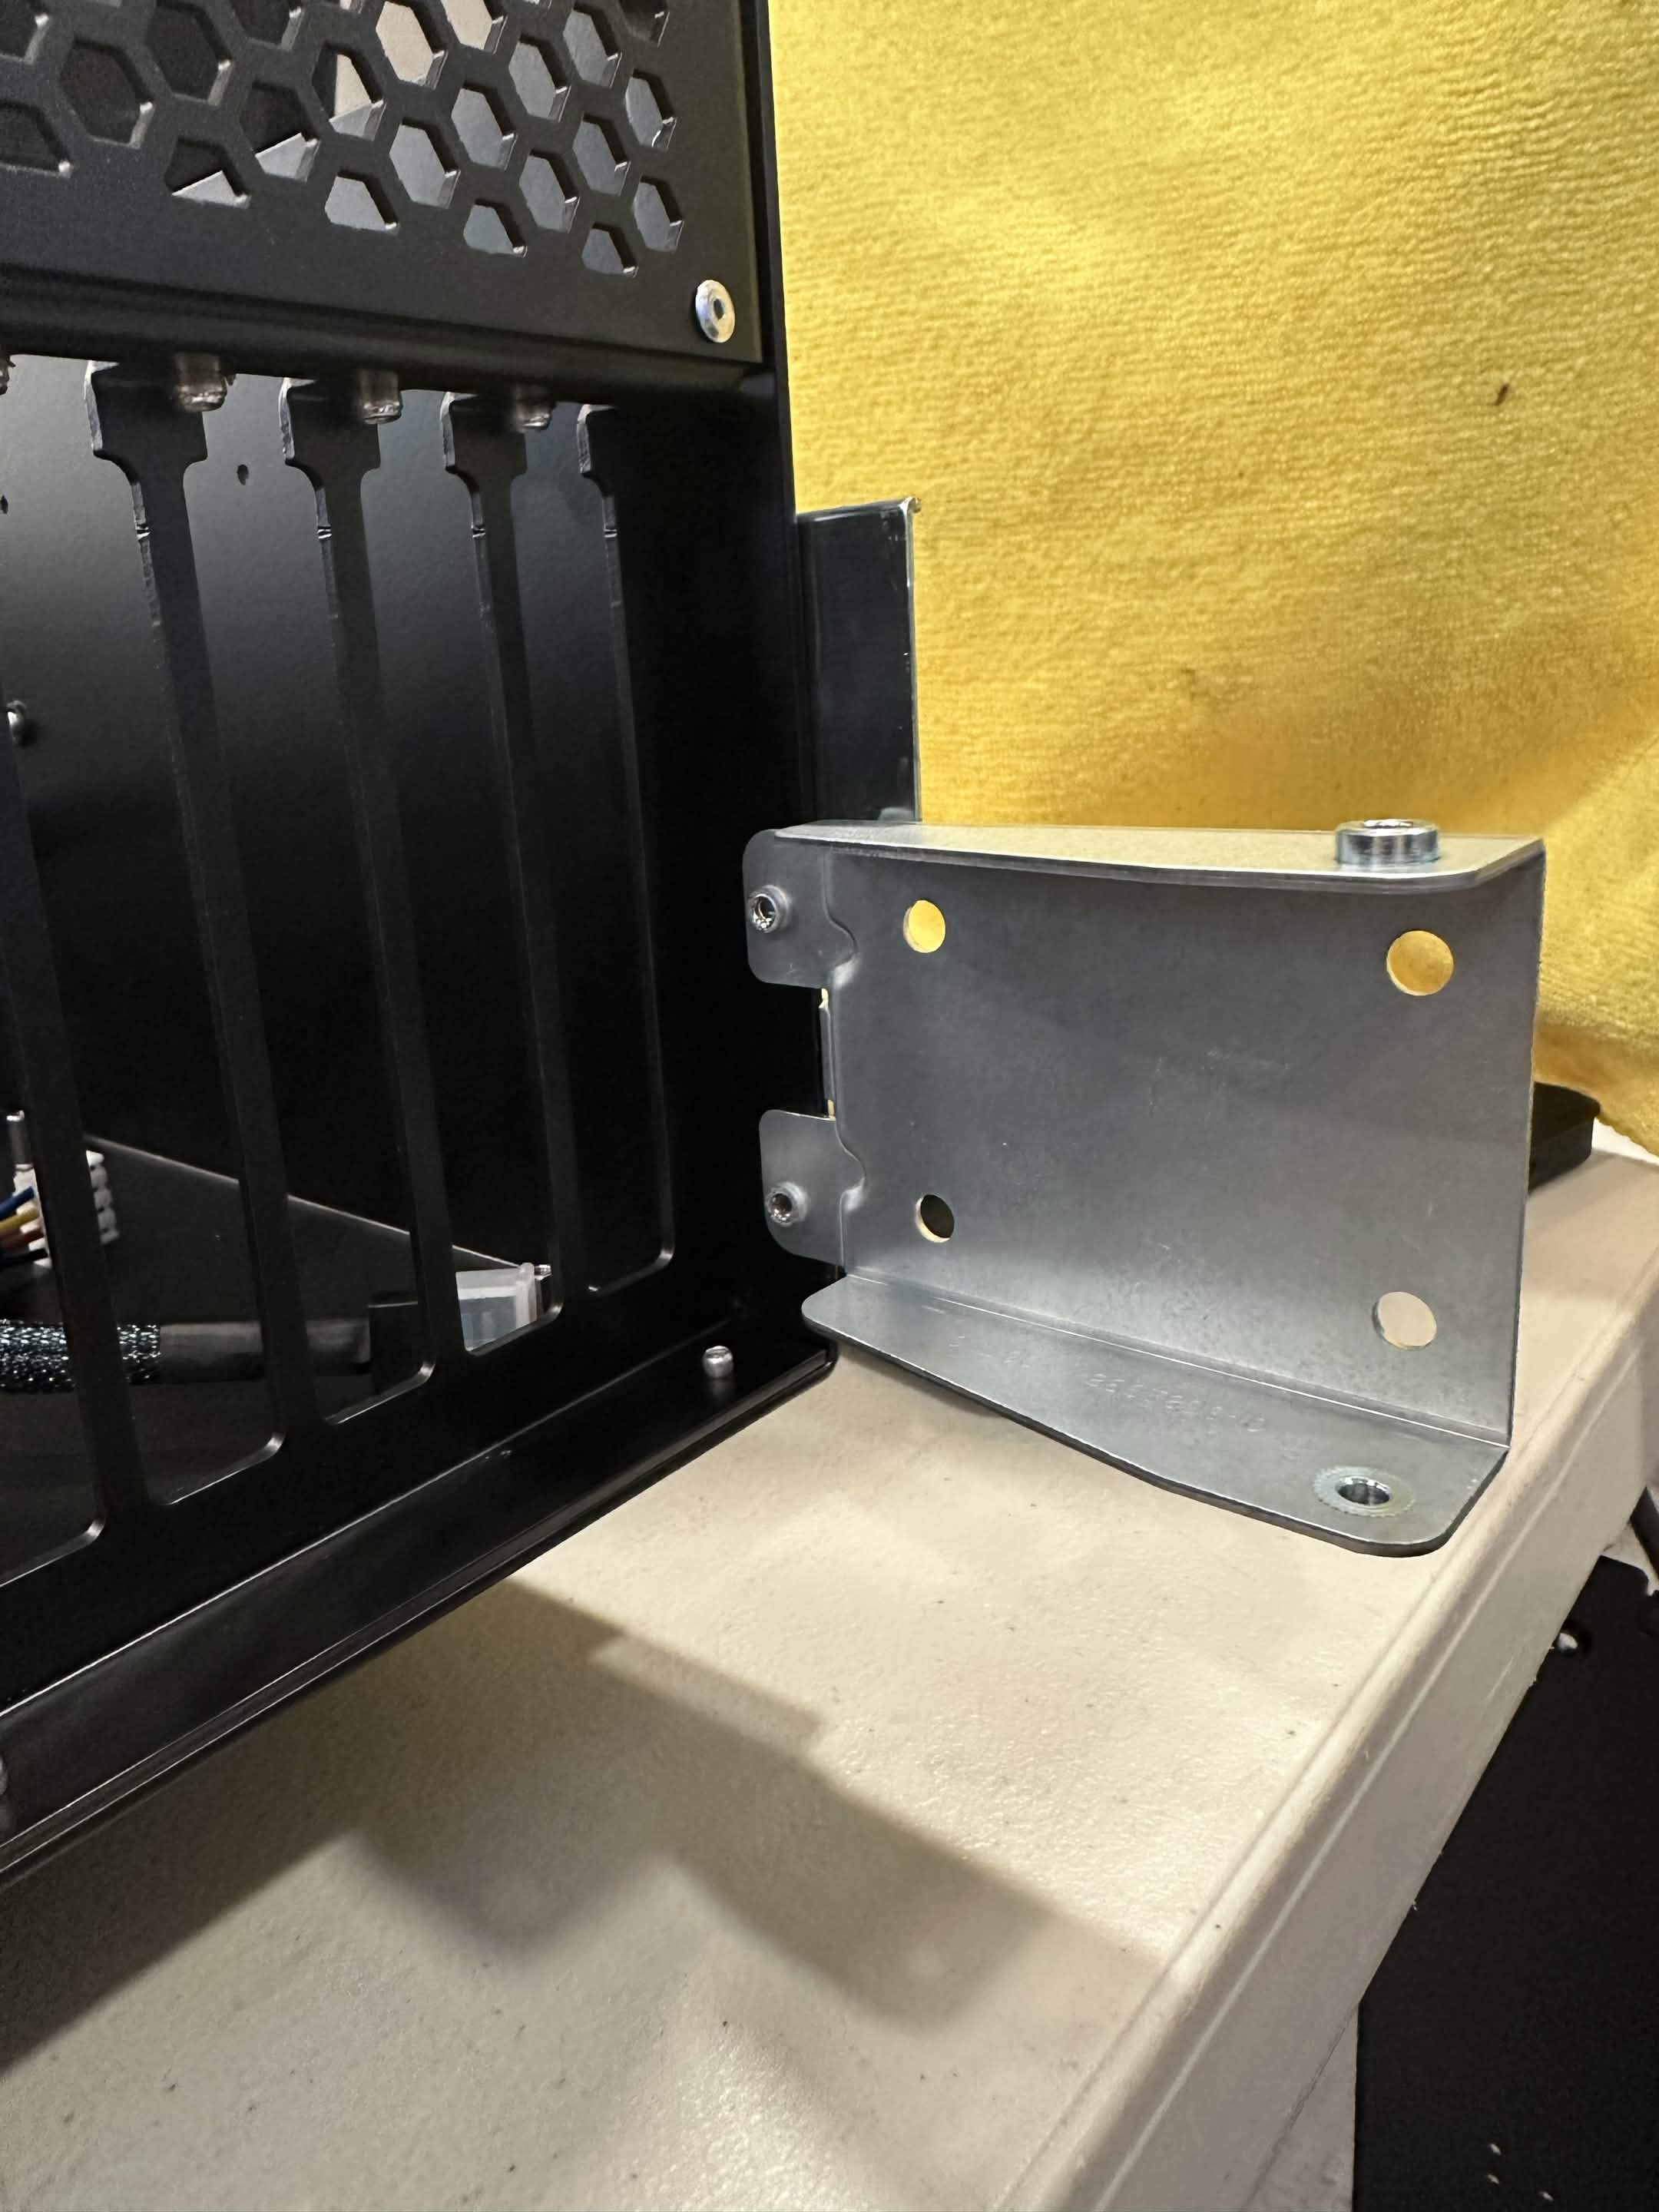
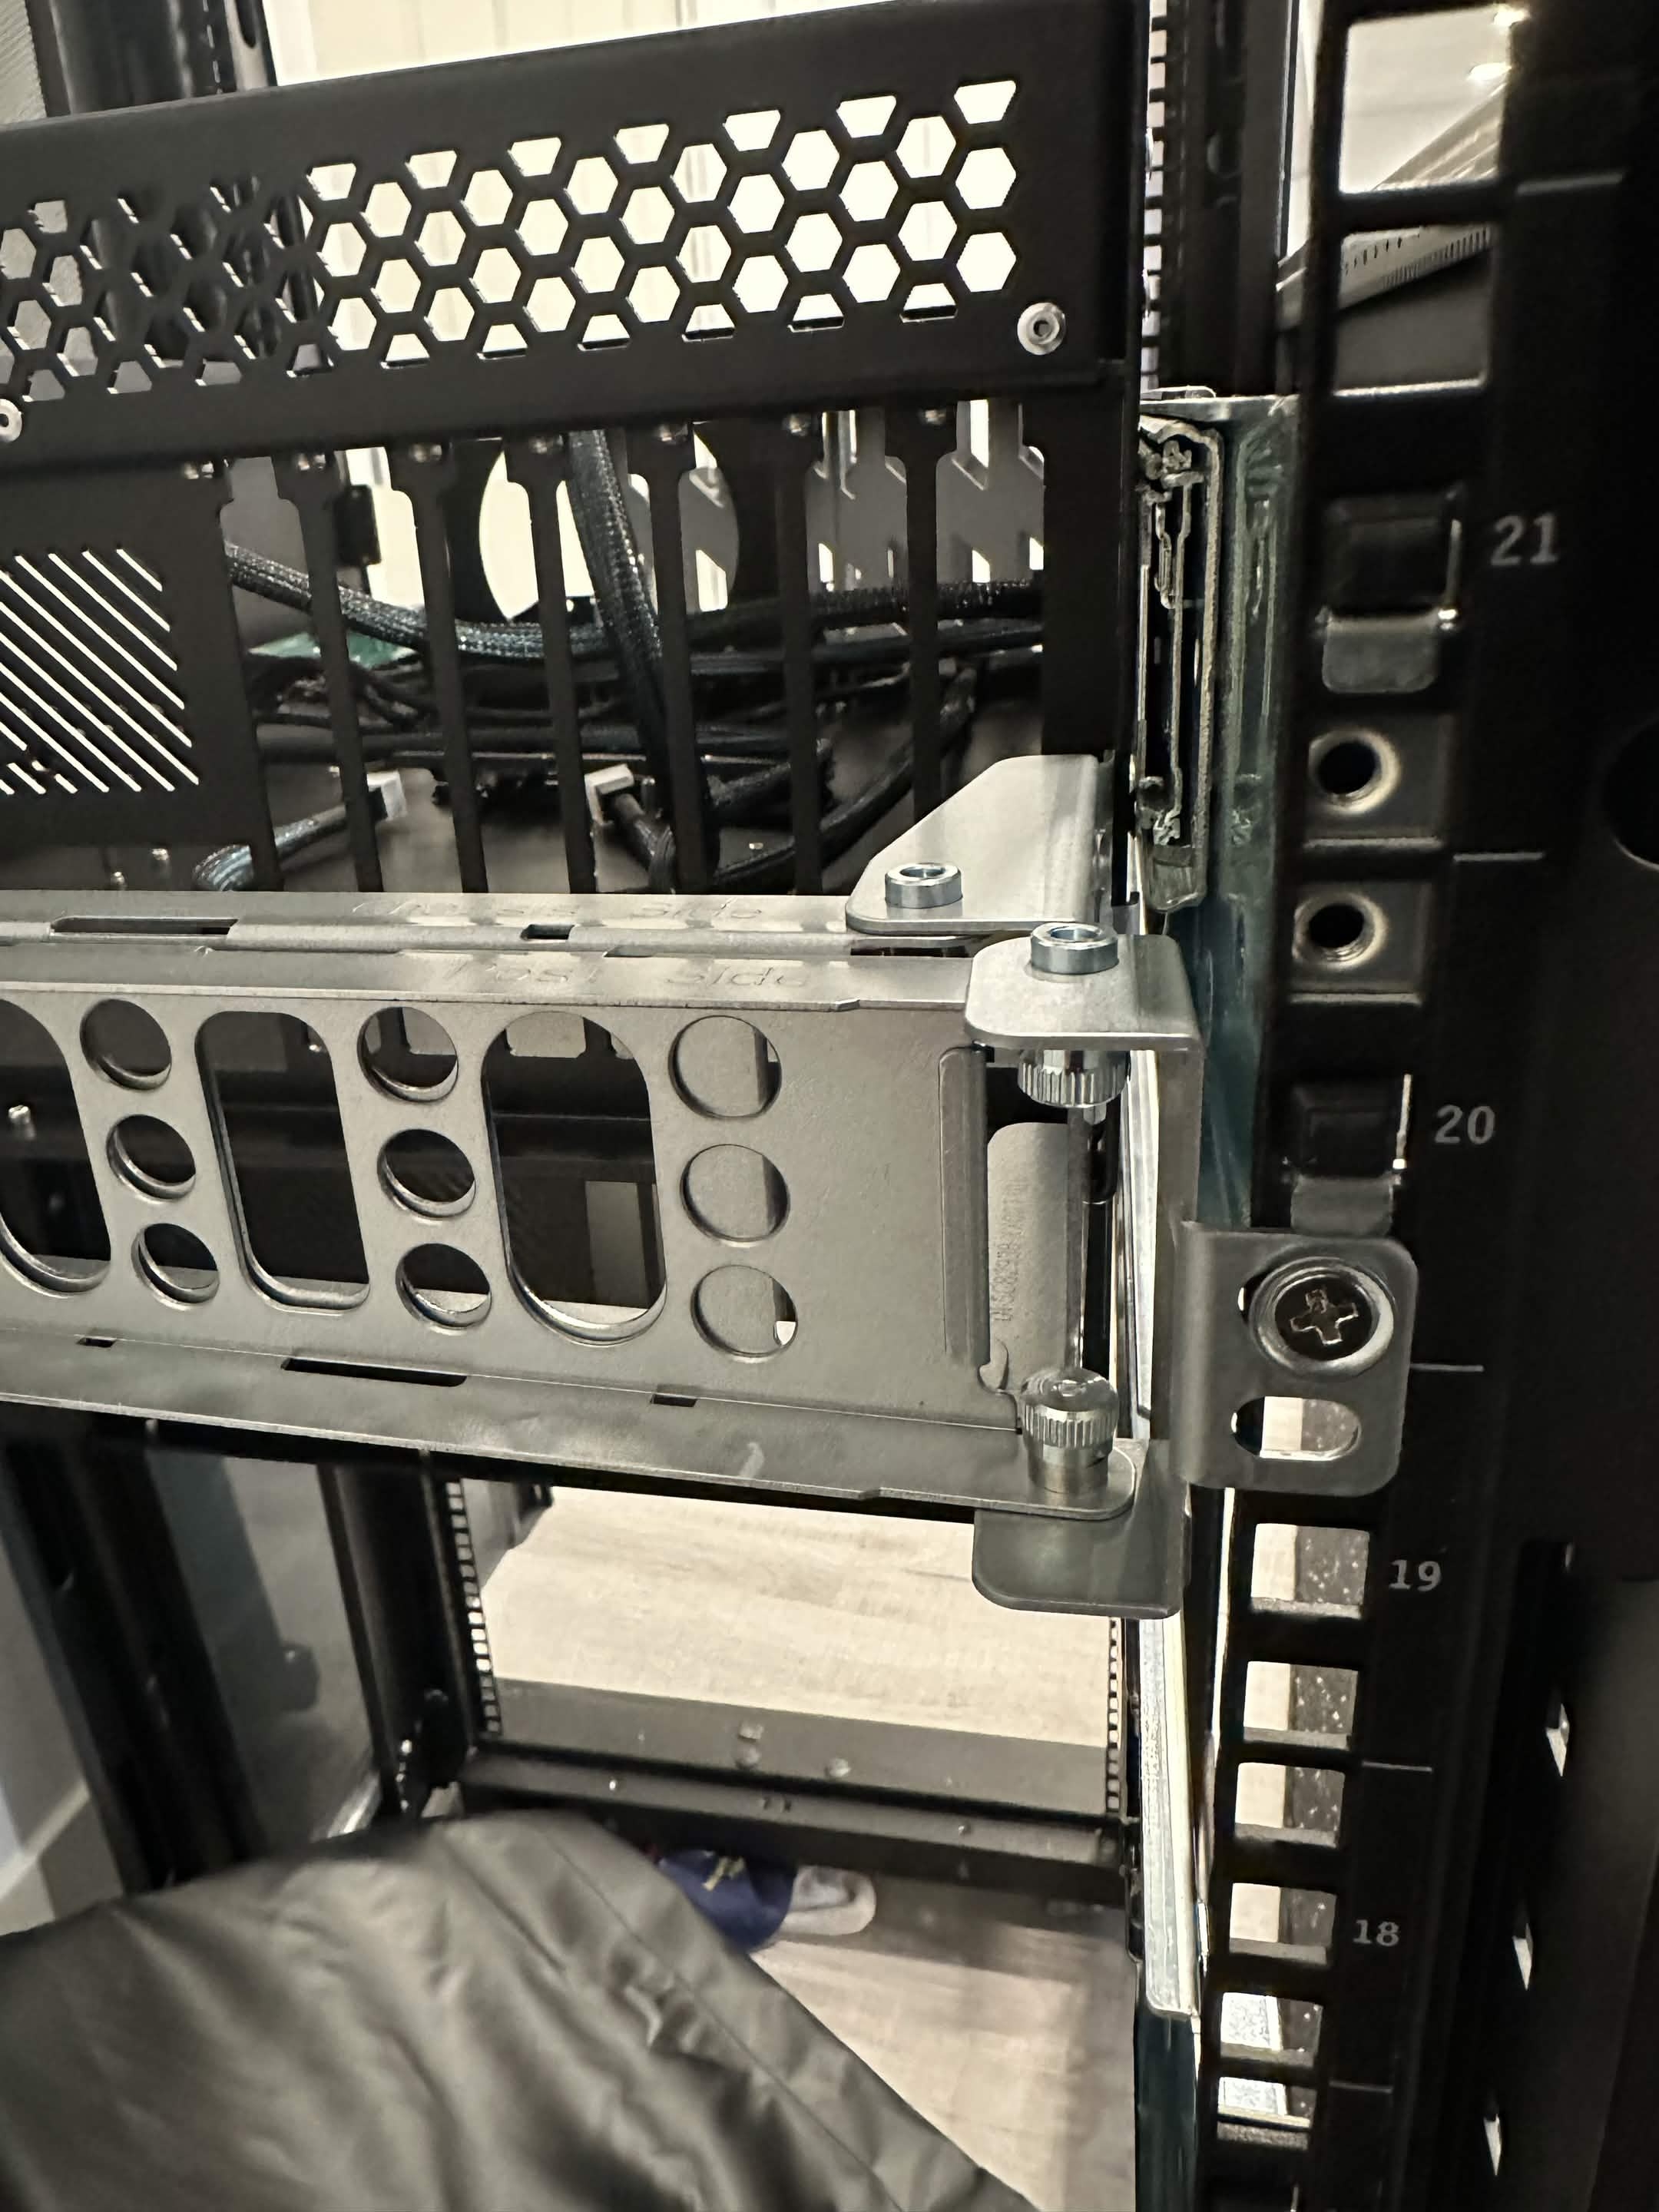
Installing the Rack Brackets
Rack Bracket - this part will be attached to the rack/rail.
Stability
Optionally, if you want more stablilty a M5 cage nut can be installed directly below the bottom most rail threaded hole.
- Align the top screw hole on the bracket to the bottom most hole on the rail.
- Using the short screws and a washer, attach the bracket to the rail as shown on the image..
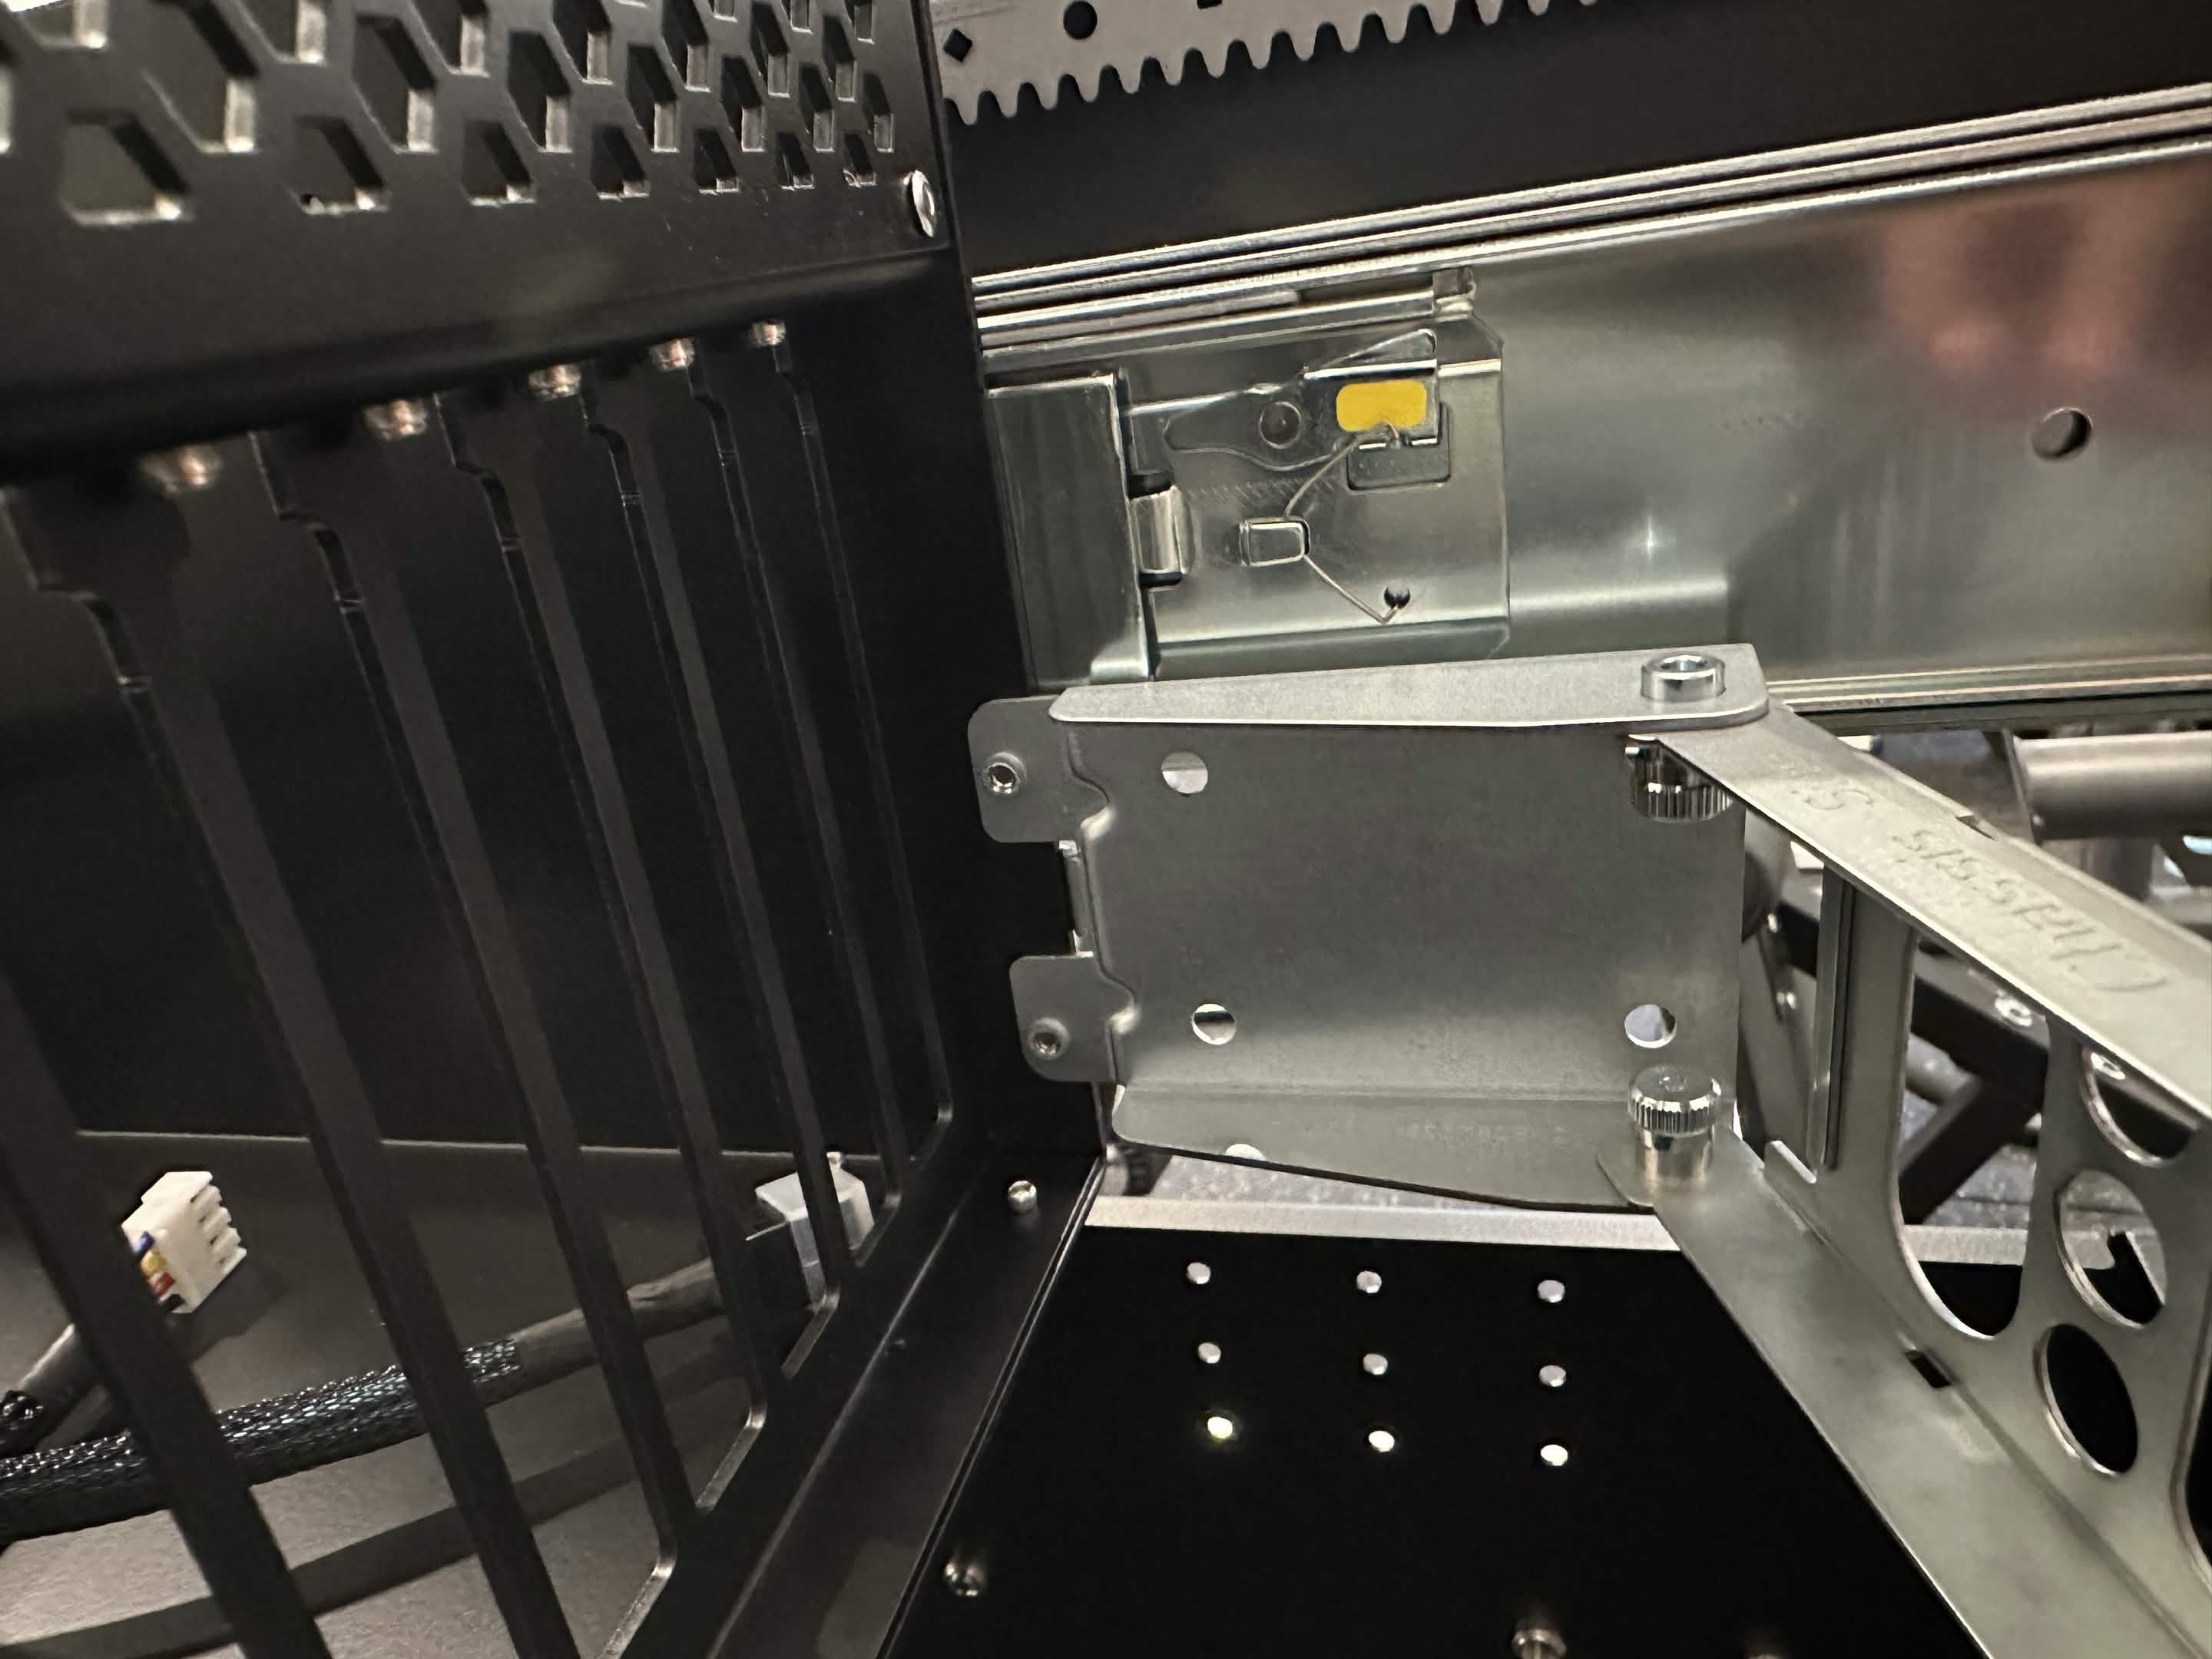
Installing the Arm
Arm - this part will be attached to the 2 brackets. Case Bracket and Rack Bracket.
- Align the side that says "Chassis side" with the case, and pulled on both alignment pins on the arm to retract them and allow for them to go into the bracket.
- Do the same on the opposite end of the arm.