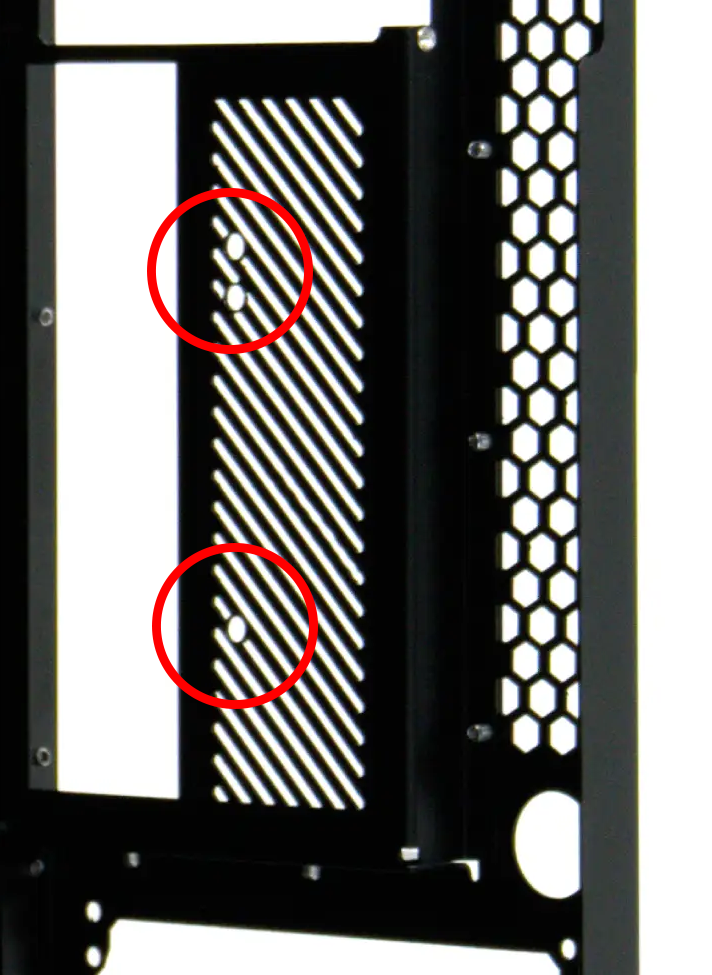
Fan Installation
The HF-L1 comes preinstalled with 3 fans on the front. The power cables for these fans are routed underneath the preinstalled PCB.
Overview
Fan Sizing Compatibility
- Front fans use 120mm fans, up to 25mm thick.
- Middle row uses 120mm fans (no thickness limit), or a radiator can be mounted in this row.
- Rear exhaust fan can be either 80mm or 92mm.
- Angled and horizontal auxiliary fan brackets can be bought seperately and support 80mm, 92mm, or 120mm.
- 9 Fans Total
- 3 front fans — 3x ARCTIC P12 Pro PST preinstalled (120mm, up to 25mm thick); power cables routed underneath the preinstalled PCB
- 3 middle row fans — 120mm (no thickness limit), or mount a radiator in this row
- 3 auxiliary fans — 1 angled and 1 horizontal for PCIe cooling (brackets and fans sold seperately, support 80mm, 92mm, and 120mm fans), plus 1 rear exhaust fan (80mm or 92mm)
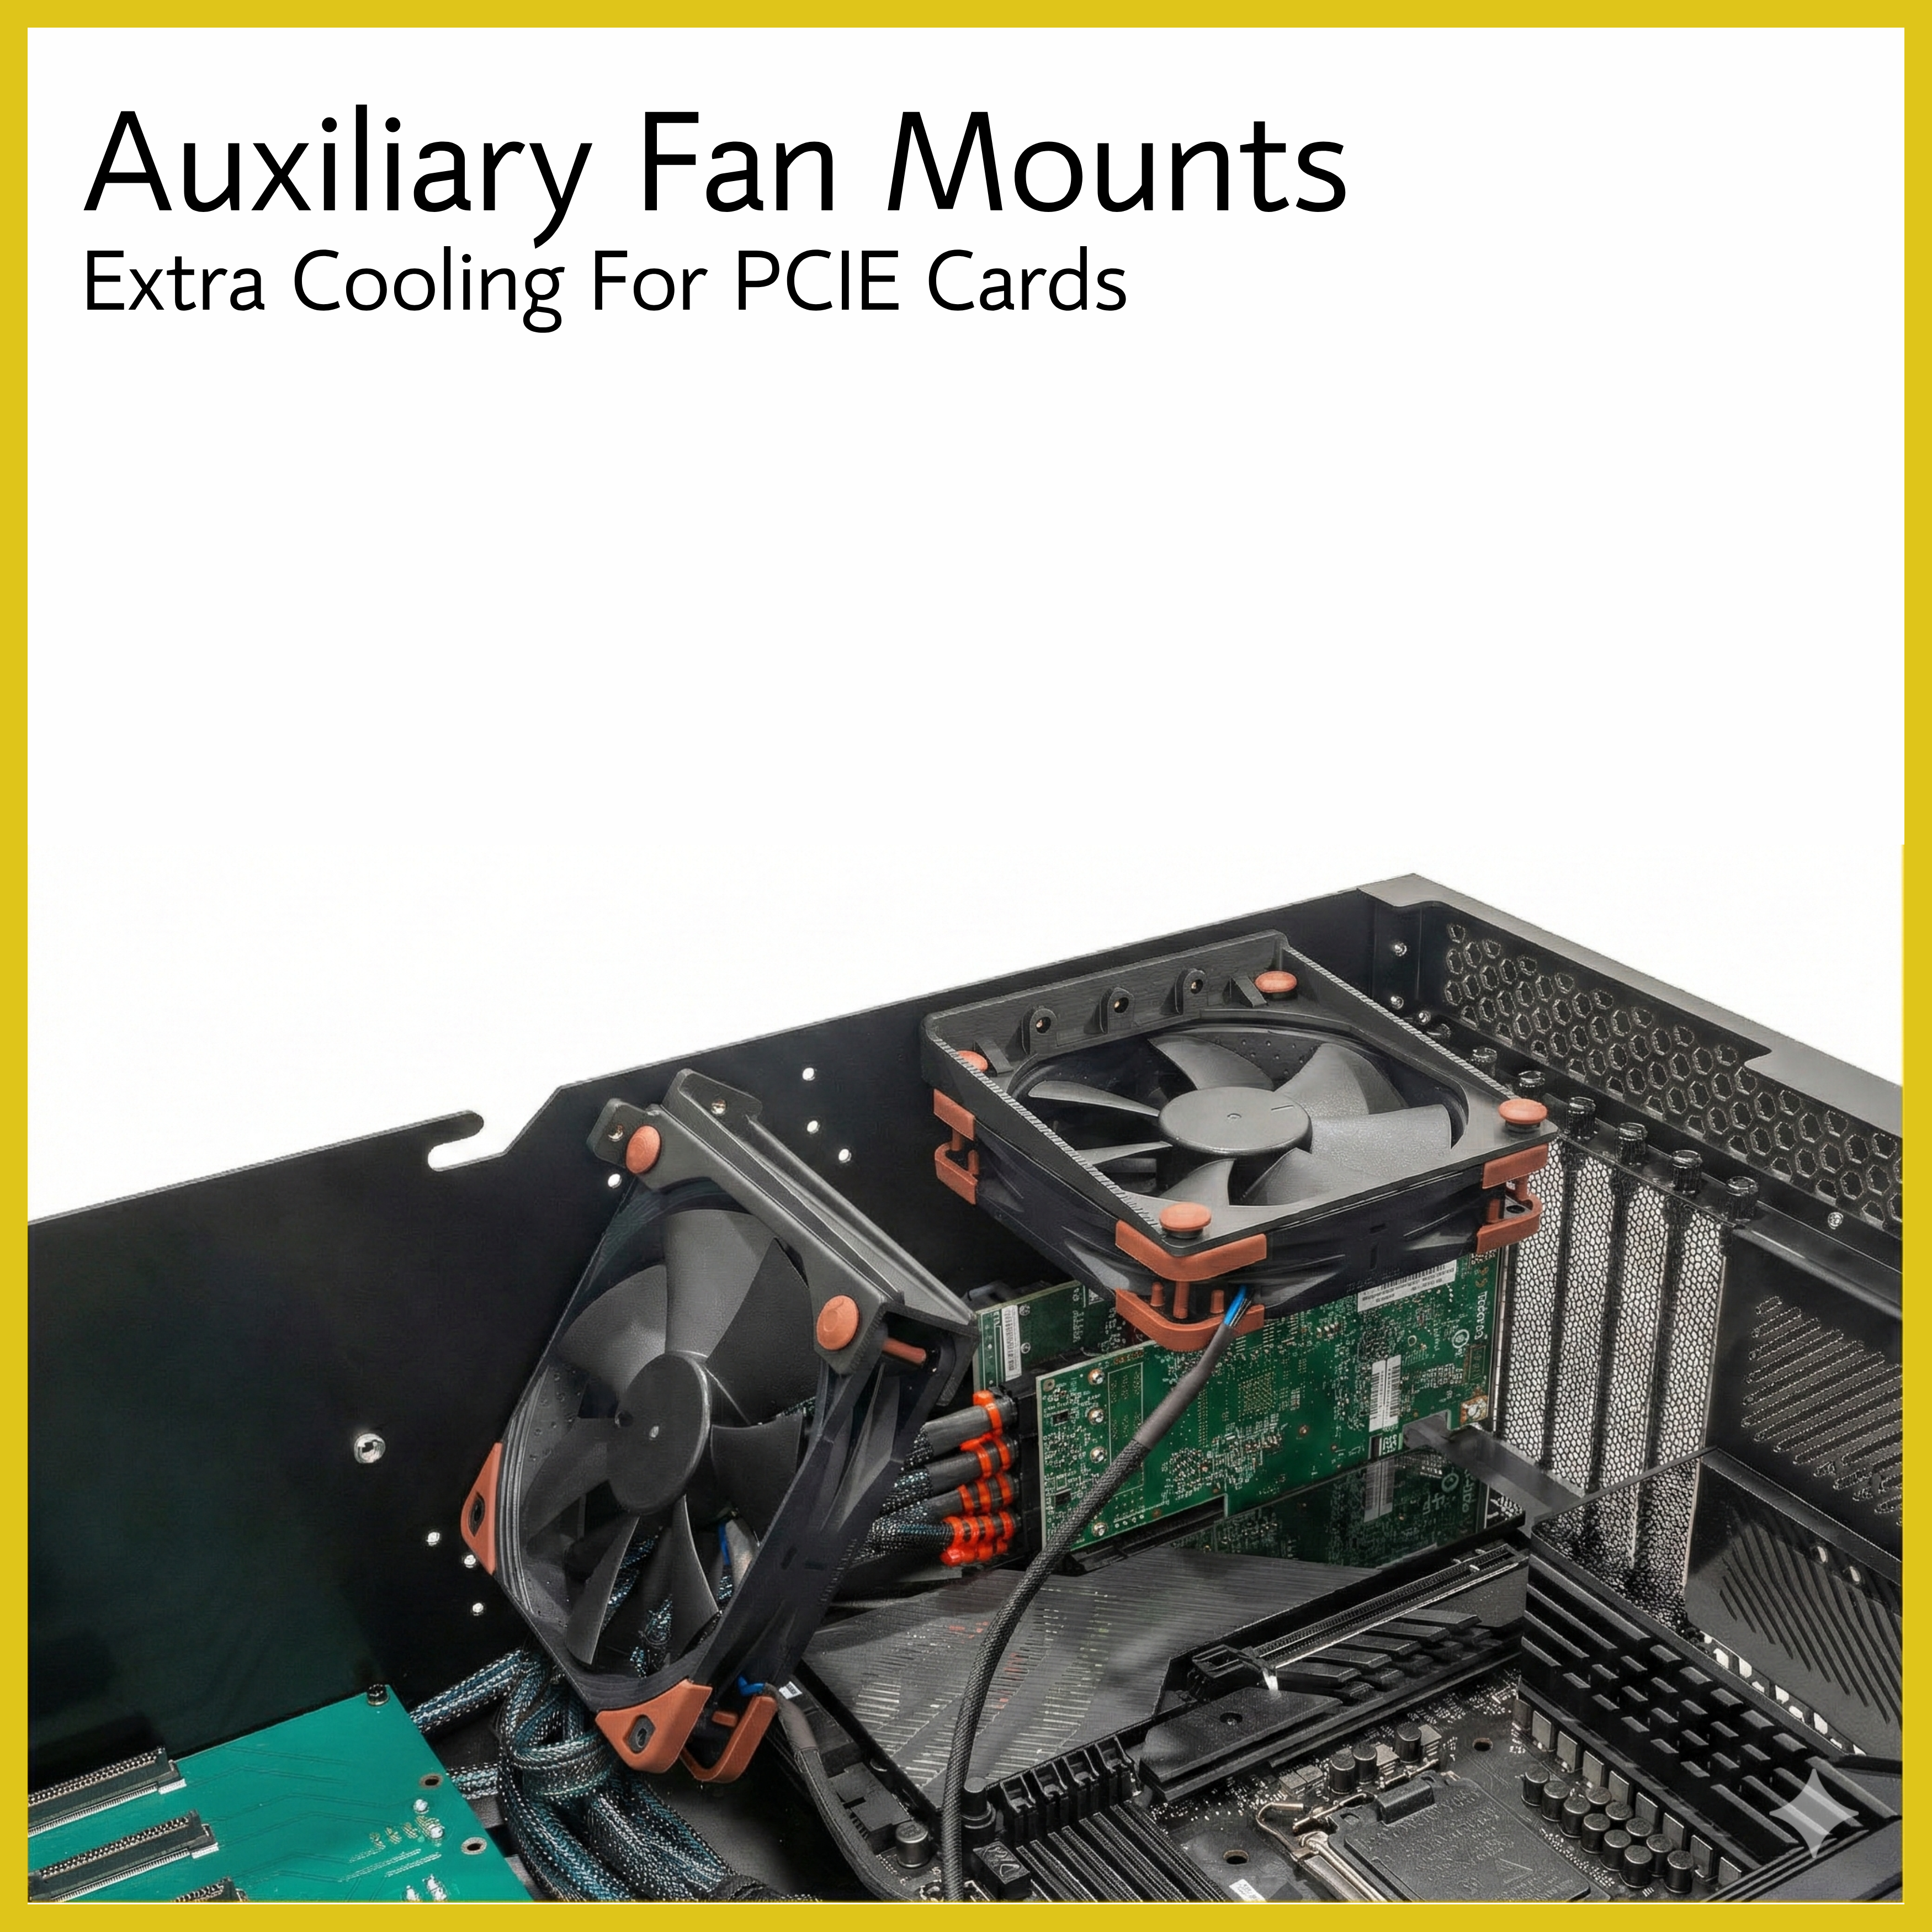
Auxiliary fans can be mounted using one of our fan brackets:
For the fans themselves, we recommend the ARCTIC P12 Pro PST
Optional Power Board
A power board can be purchased separately for PWM fan control and usage of HakoFoundry.
Installation Process
Safety First
It is always recommended to power down the system when working inside the case.
Front Fan Wall
- Disconnect the fan header cables that come preinstalled with the case.
- Unscrew the face plate from the chassis.
- Unscrew the fan your replacing from the face plate
Follow in reverse order to reassemble.
It's advised to route the fan header cables underneath the PCB.
Auxiliary Fans
- Attach your fan to the bracket.
- Screw the bracket into the desired mounting holes with provided hardware. (There are multiple to accomodate for larger PCIe cards)
- Connect fan headers.
Auxiliary fans mount to one of two brackets, sold separately.
Angled Fan Bracket
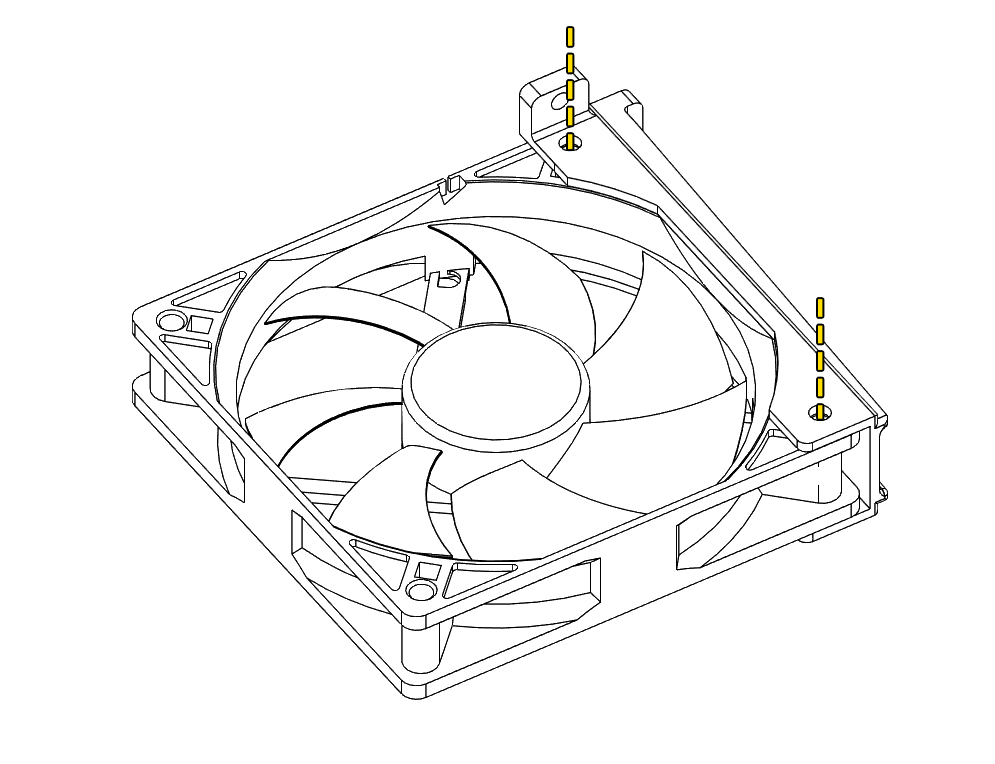
Use 2 of the mounting holes to secure a fan to the angled bracket.
Horizontal Fan Bracket
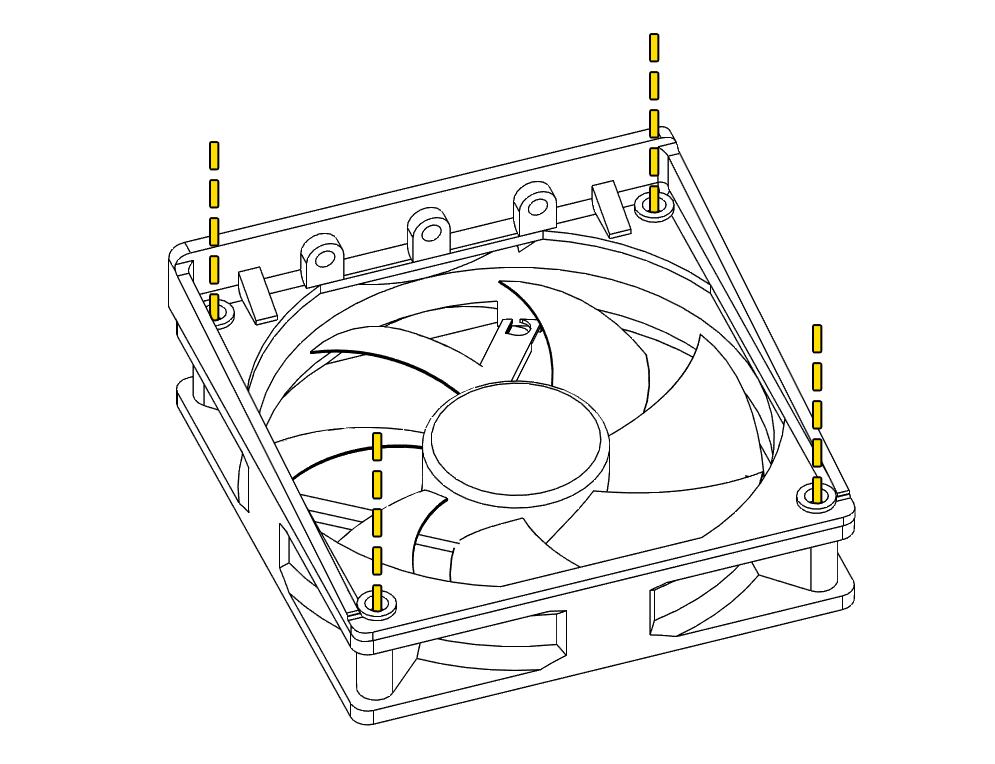
Use 4 of the mounting holes to secure a fan to the horizontal bracket.
Direction of Air Flow
Take note of the fan mount direction to ensure proper air flow. Depending on the bracket orientation installed in the case, the fan may be flipped.
Horizontal Overhang Mount
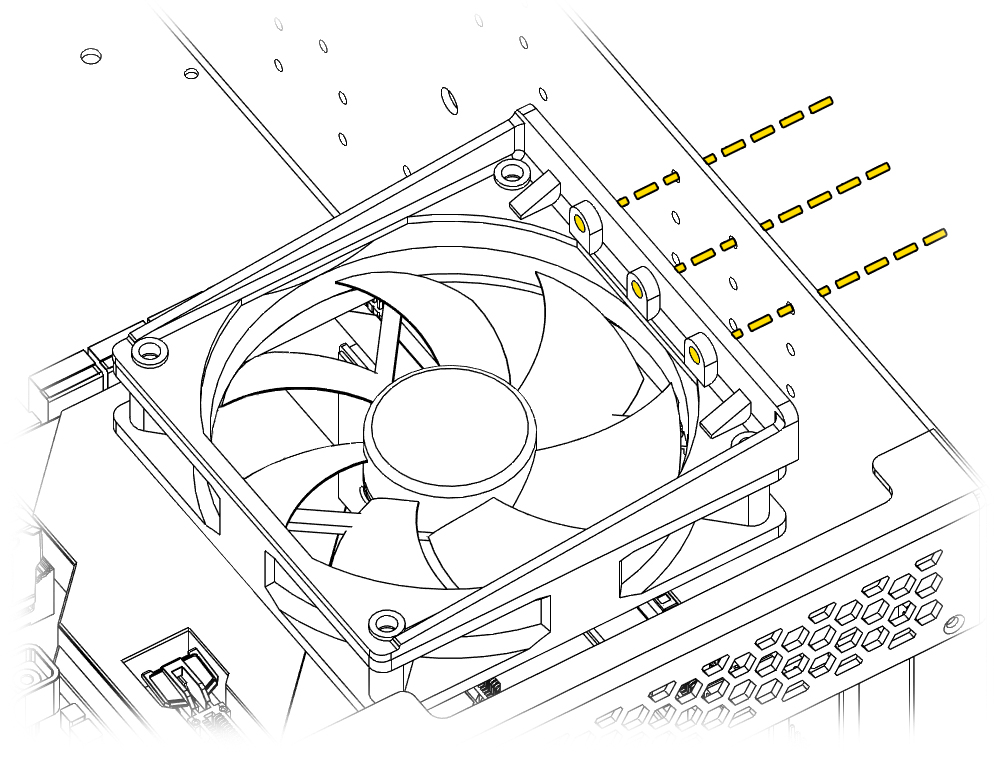
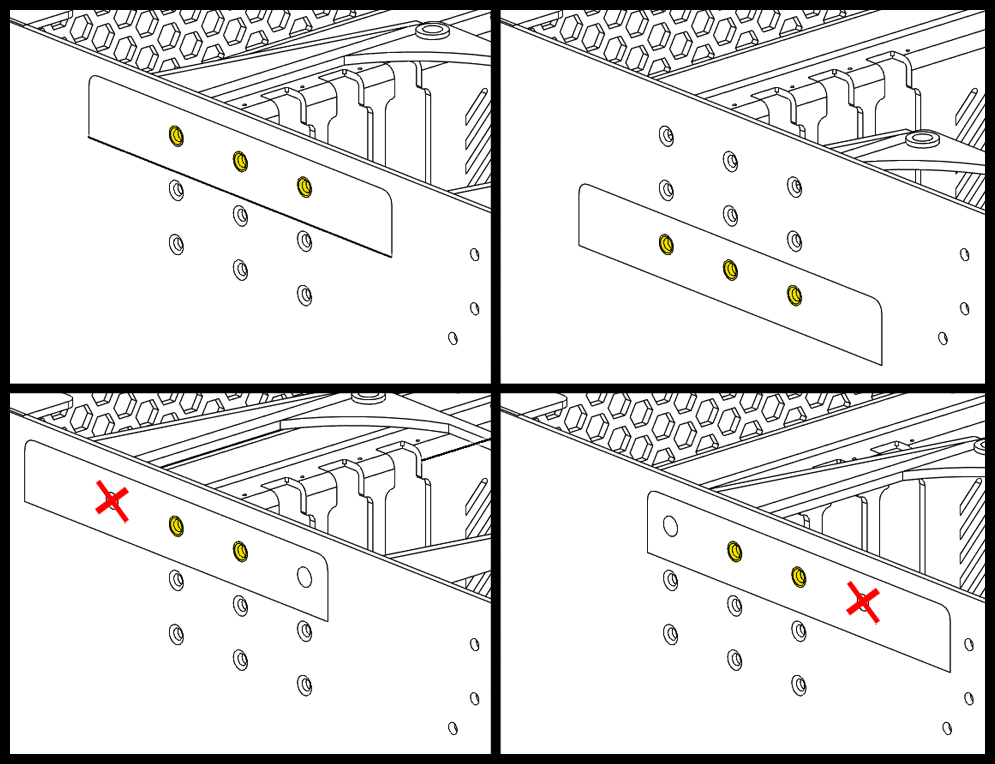 The mounting location can be moved left and right as well as up and down.
Left or Right Mount Points
When installing in the shifted left or right position, one of the mount points will not be used.
Angled Overhang Mount
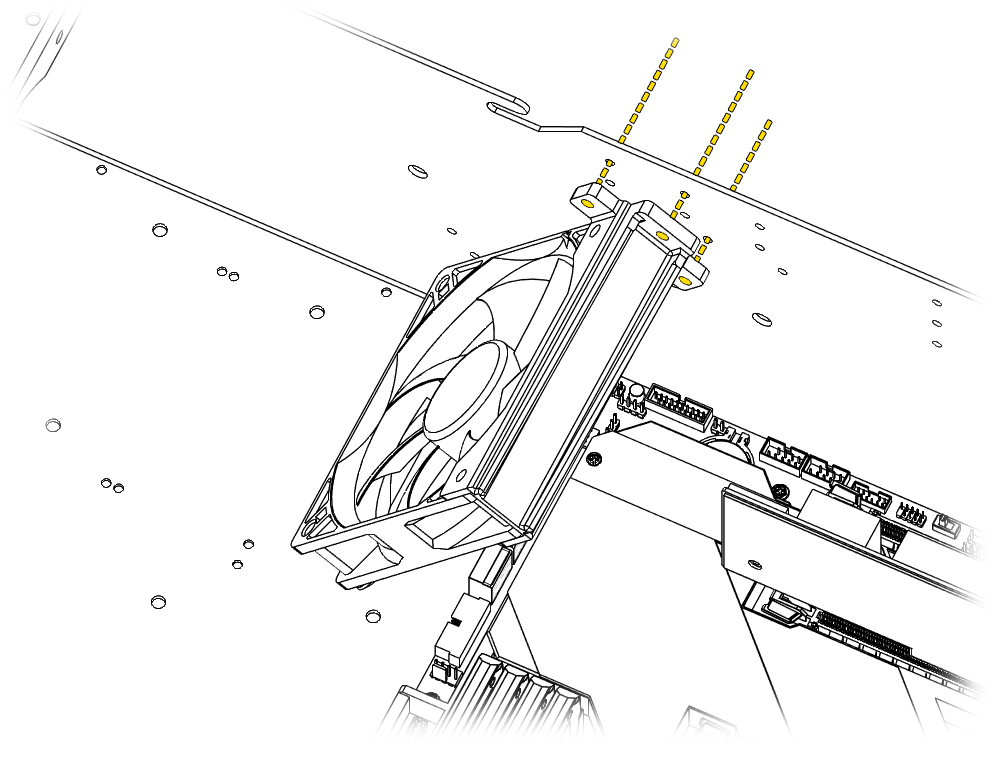
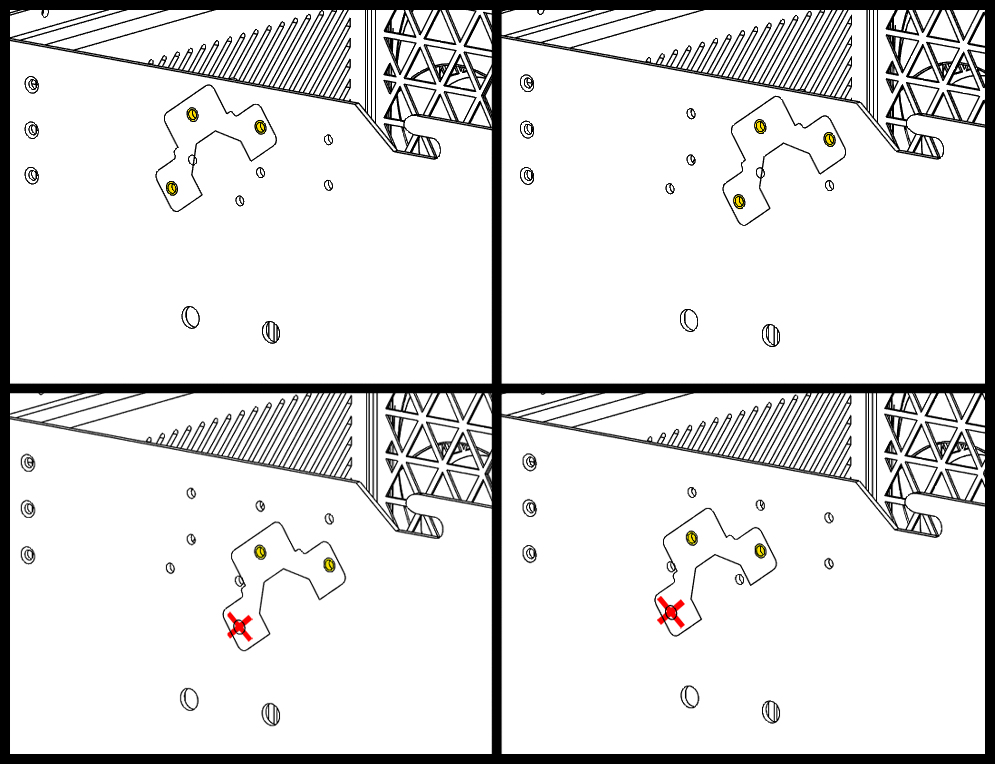 The mounting location can be moved left and right as well as up and down.
Lower Mount Point
When installing in the lowered position, one of the mount points will not be used.
Angled Underhang Mount
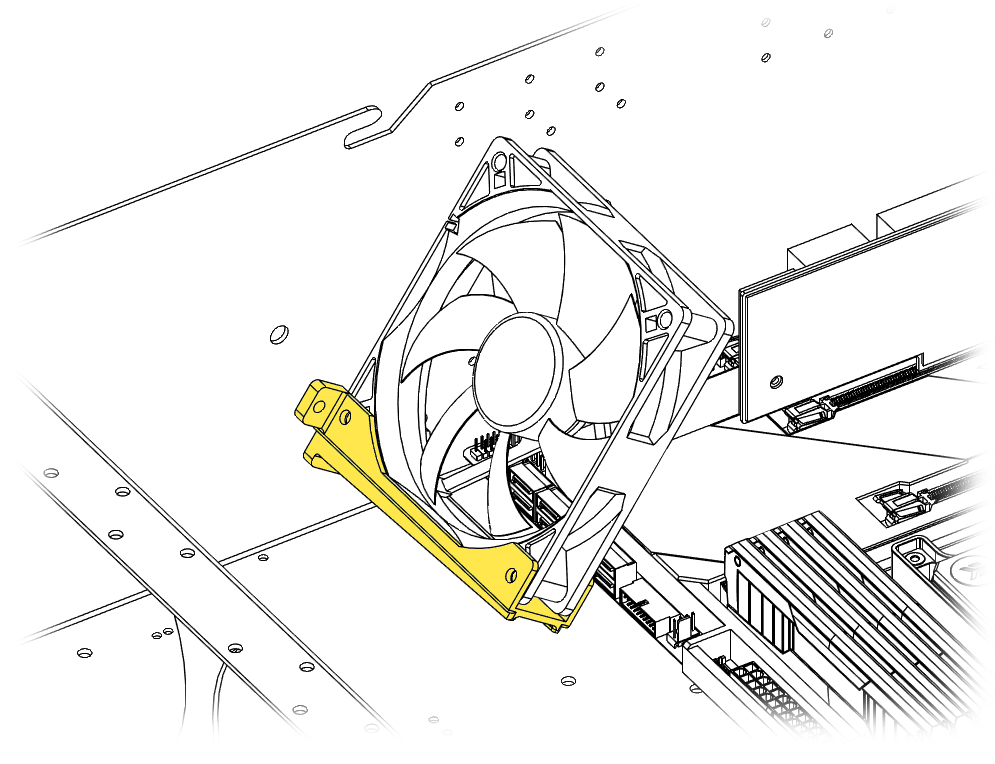
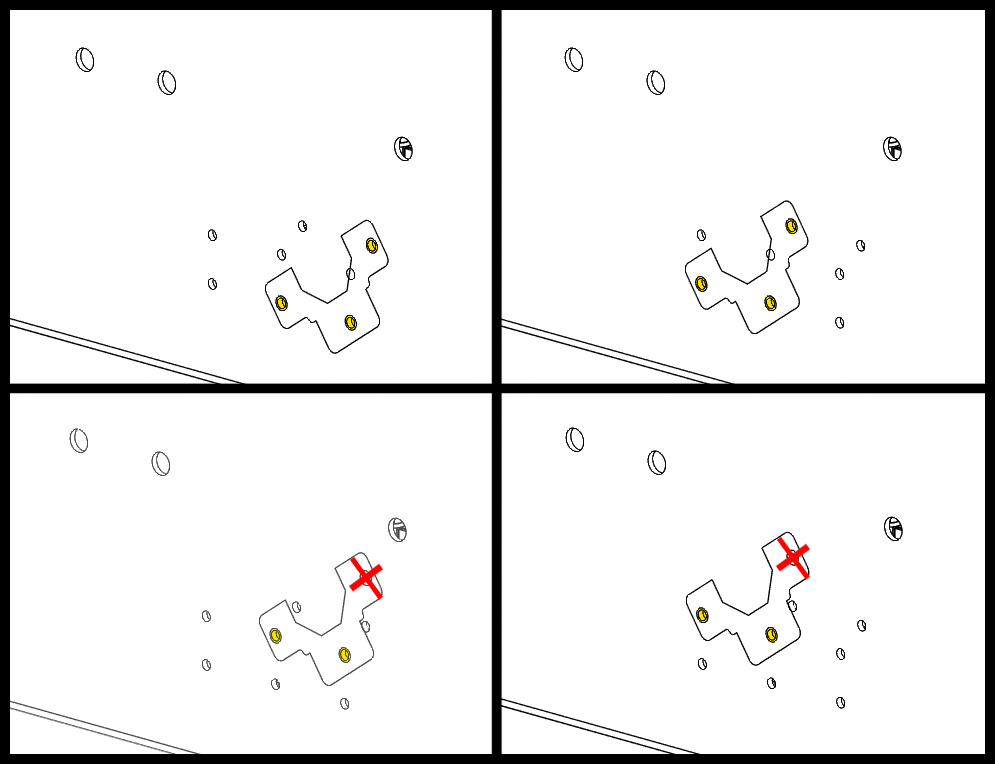 The angled fan bracket can also be under mounted. This can be useful depending on wire clearances with different HBA cards.
Mount Extension
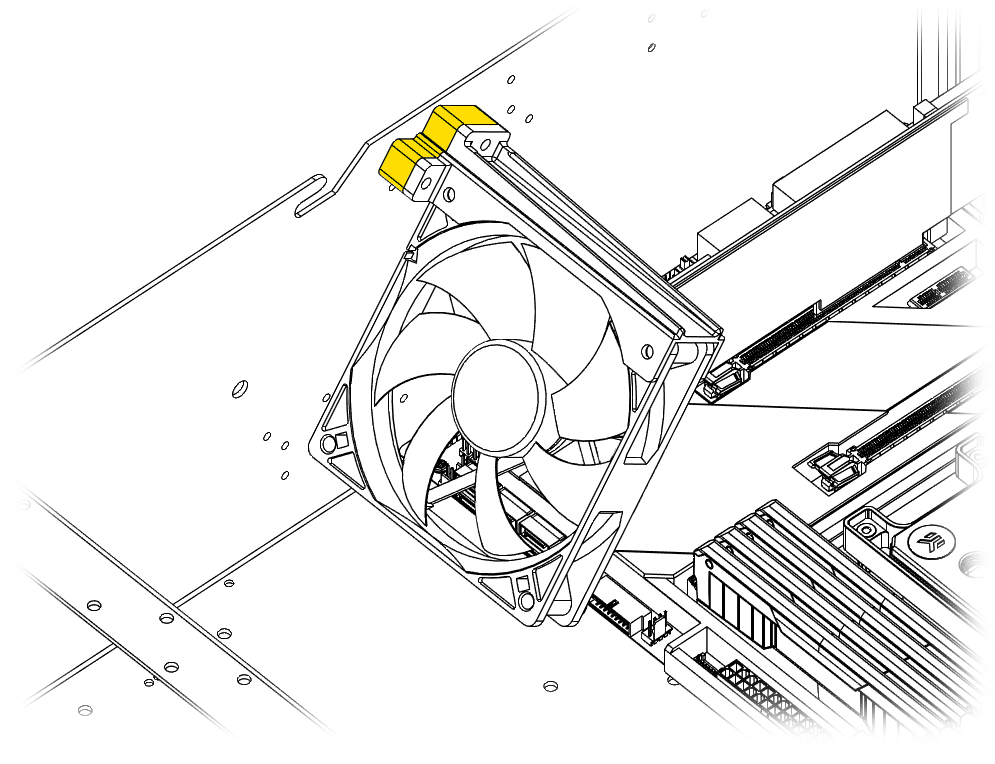 The included mount extensions can be used to extend the bracket out for extra coverage on the furthest PCIe card. Use the extended screws for this configuration.
Rear Exhaust Fan
With an 80mm or 92mm fan there are mounting holes on the back, angled exhaust port of the case that the fan can be mounted to. Shown below.